
Integration with Dropbox
The EFFORT Integrator is an independent tool that could help in transferring data between Spoors & other client systems through Secured Application Programming Interface (API). You can post the data of the Works and Forms to the configured endpoints using REST API calls.
Dropbox is a cloud storage service that lets you save files online and sync them to your devices. You can use Dropbox links to share files and folders with other people without sending large attachments.
Step 1. Generate Dropbox Credentials for Integration
- Click the below link.
-
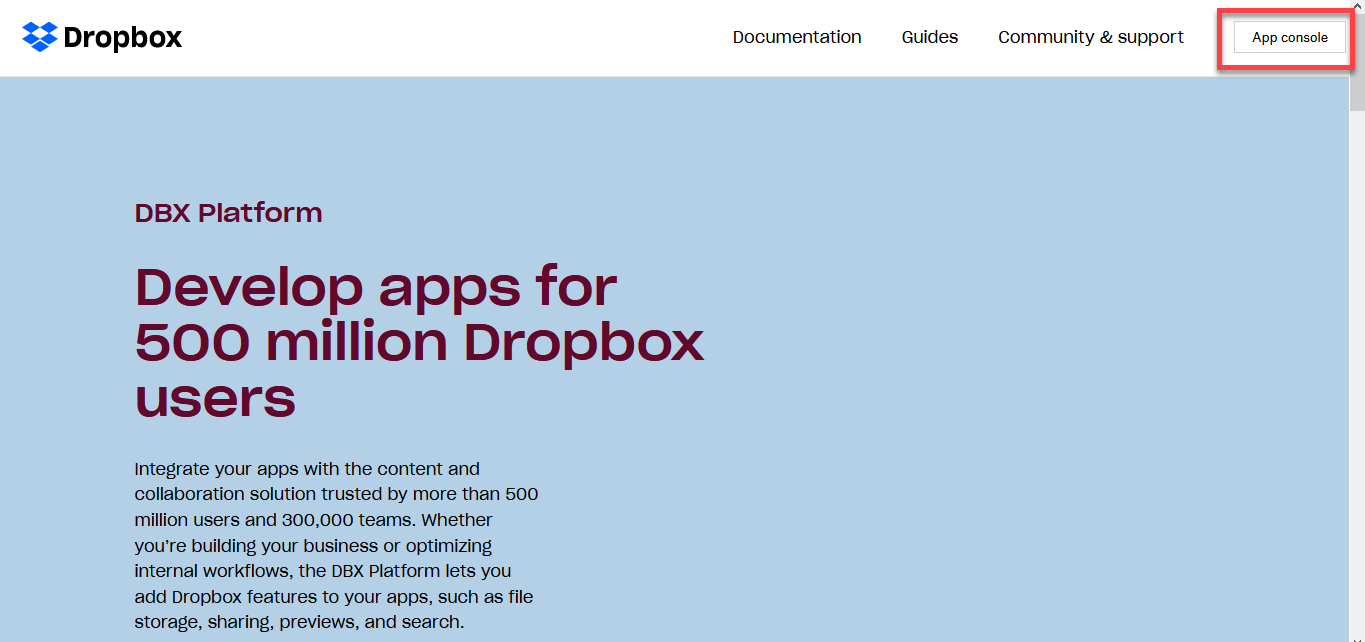
You will see the Dropbox developers page. On this page, click the app
console button located on the top right corner.
- Log in to Dropbox or Register if you don't have an account.
-
After you log in to Dropbox, click the Create App button.

-
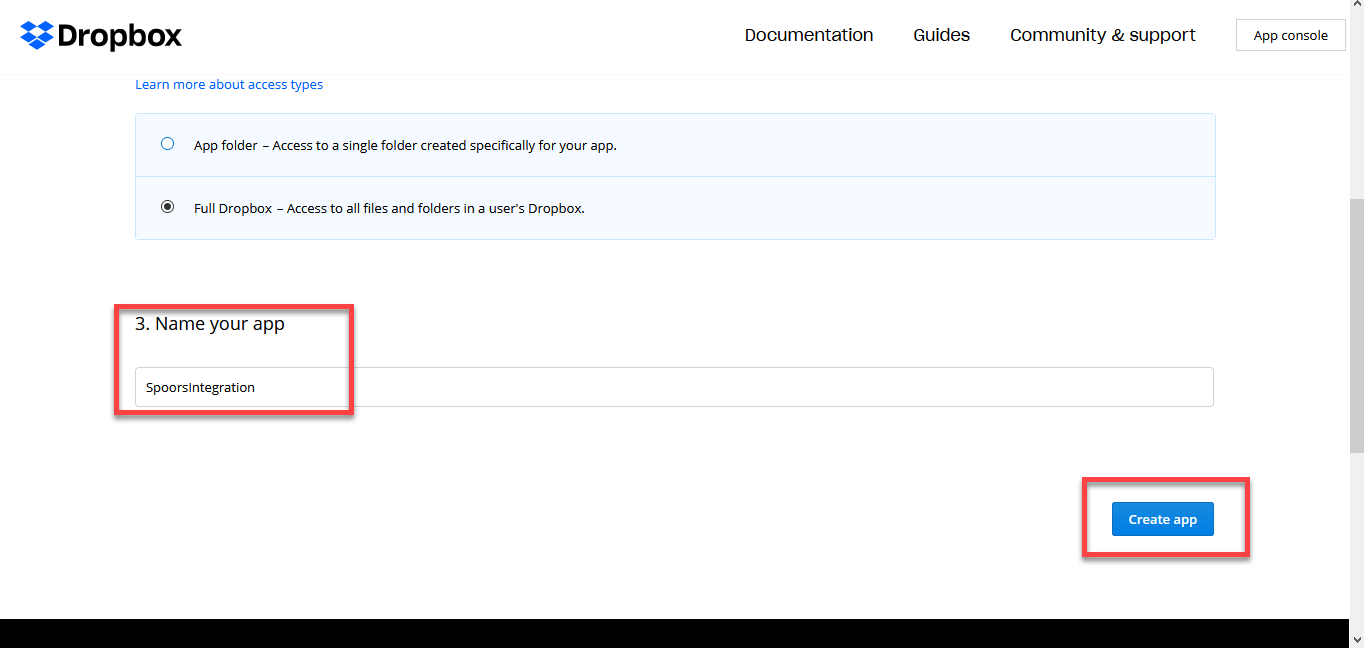
On the create app page, click the Scoped access radio button, and
for the second one, click Full Dropbox.

-
Enter a name to your app in the Name your app field and click
Create app button.
-
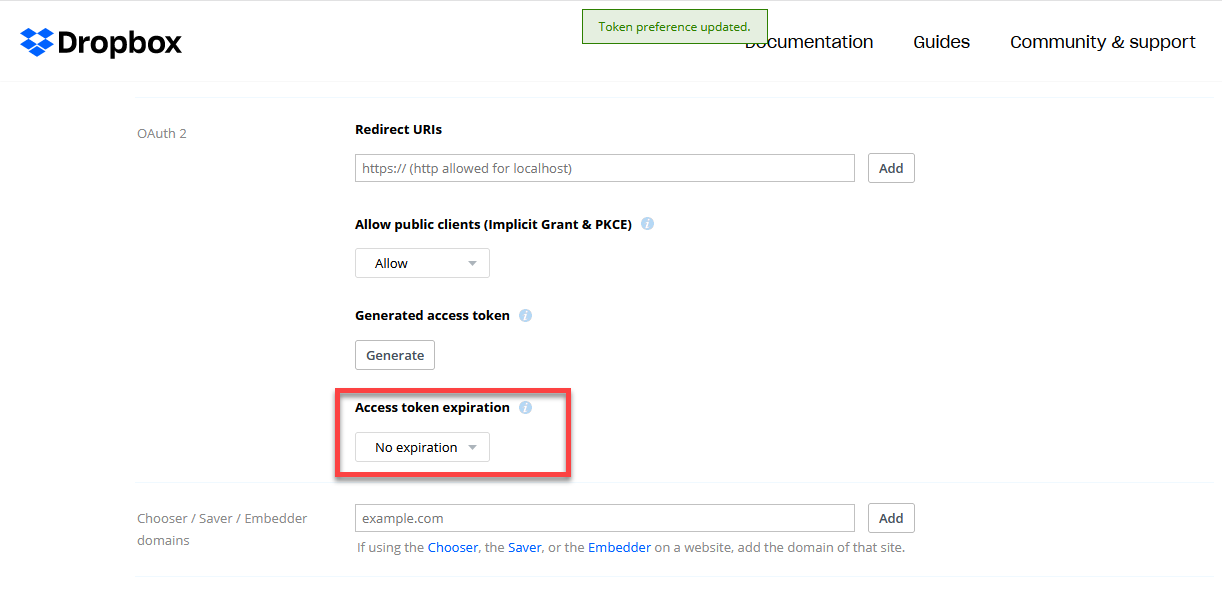
Now you will see the app settings and permissions page. Scroll down this
page. You will find the OAuth 2 section as highlighted below.

-
Set the Access token expiration to No expiration, as
highlighted below.
-
Now click Generate button under the Generated access token to
generate the access token.
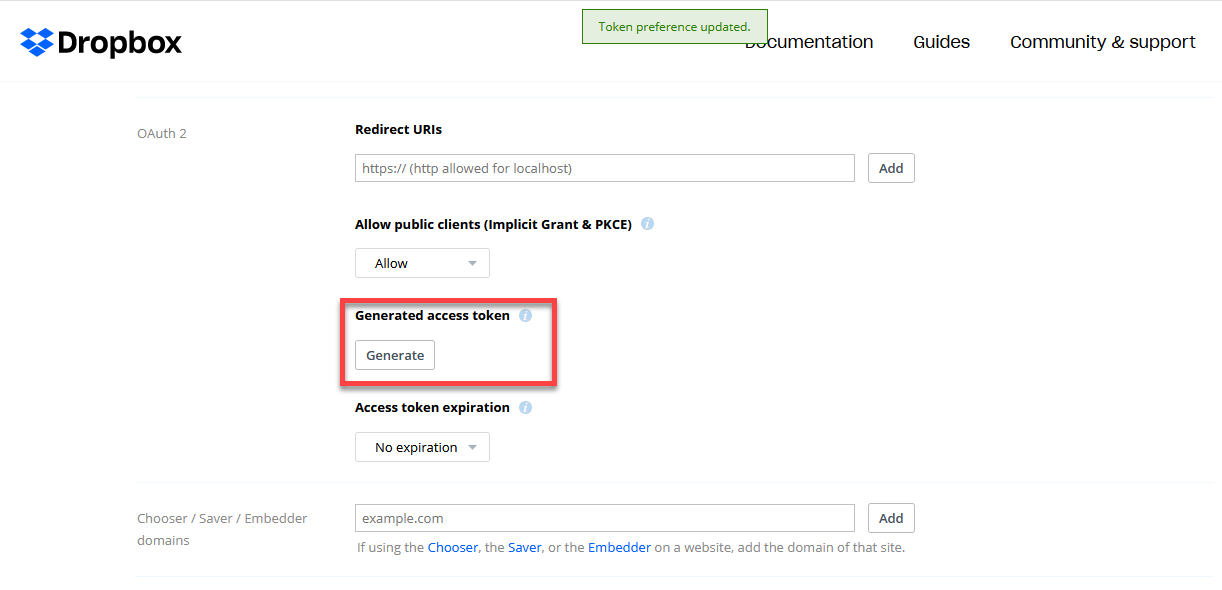
You can view the generated access token. Copy the access token for further configurations.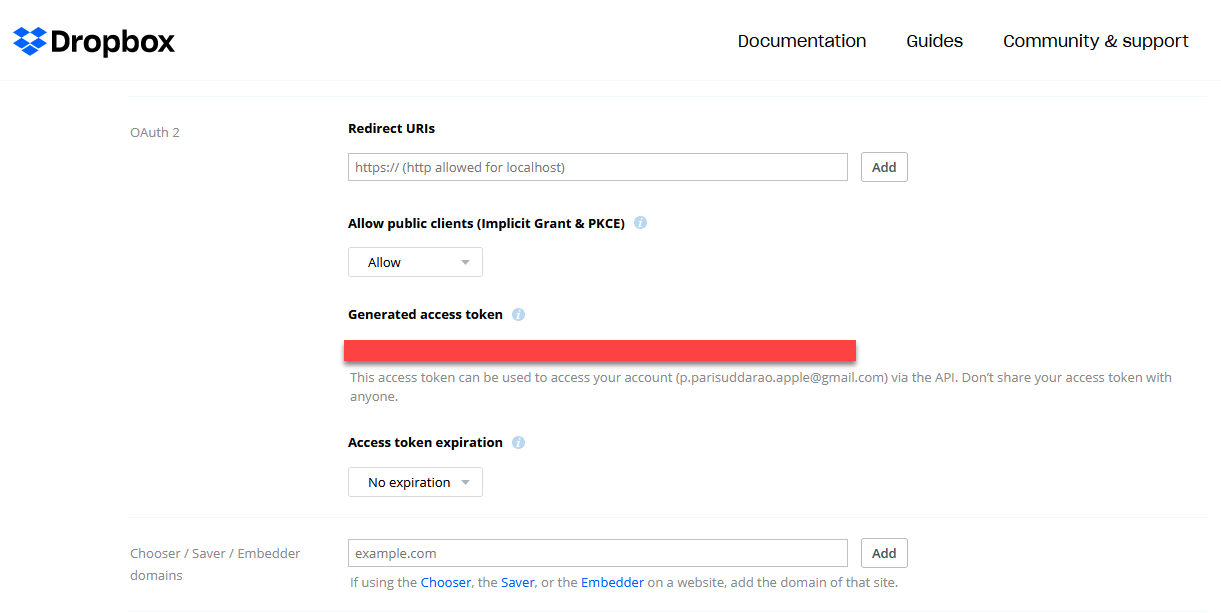
Step 2. Create Endpoint Configuration
This section helps you to create an endpoint in the Integrator module.
-
Login to EFFORT and click the Integrator card on the welcome
page.
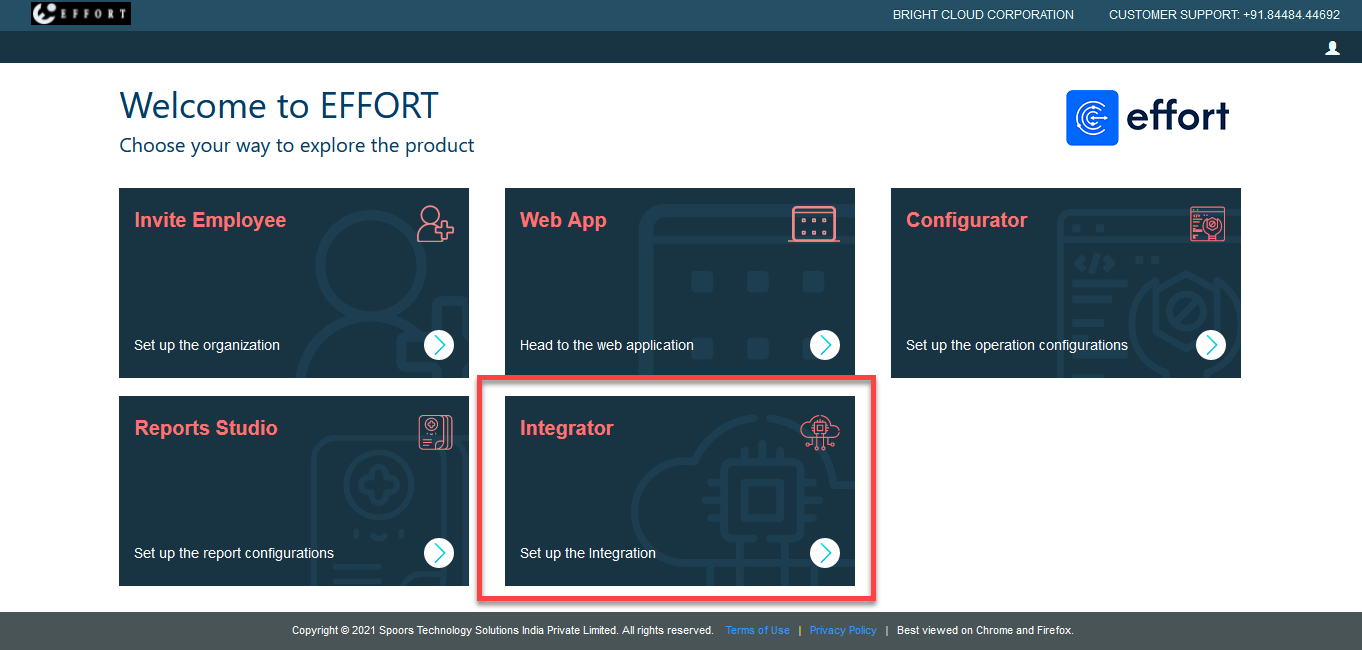
You will see the home page of the Integrator module.
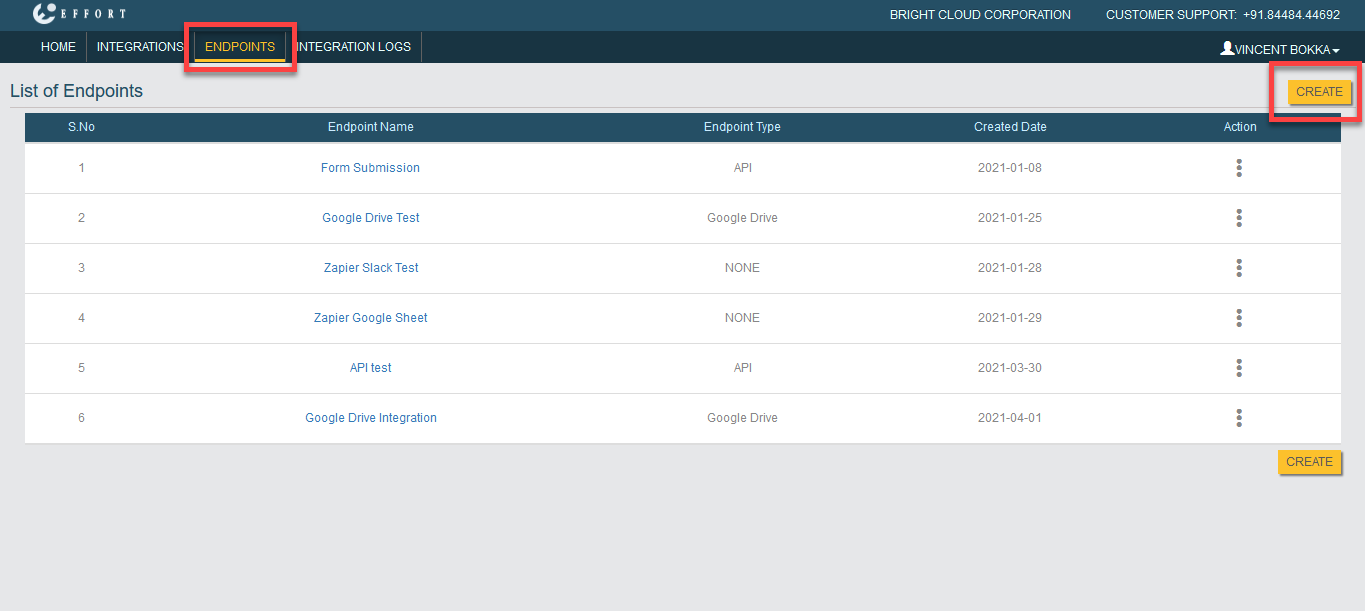
-
Click on the Endpoints module. You will see the List of
Endpoints page. On this page, click Create button.
-
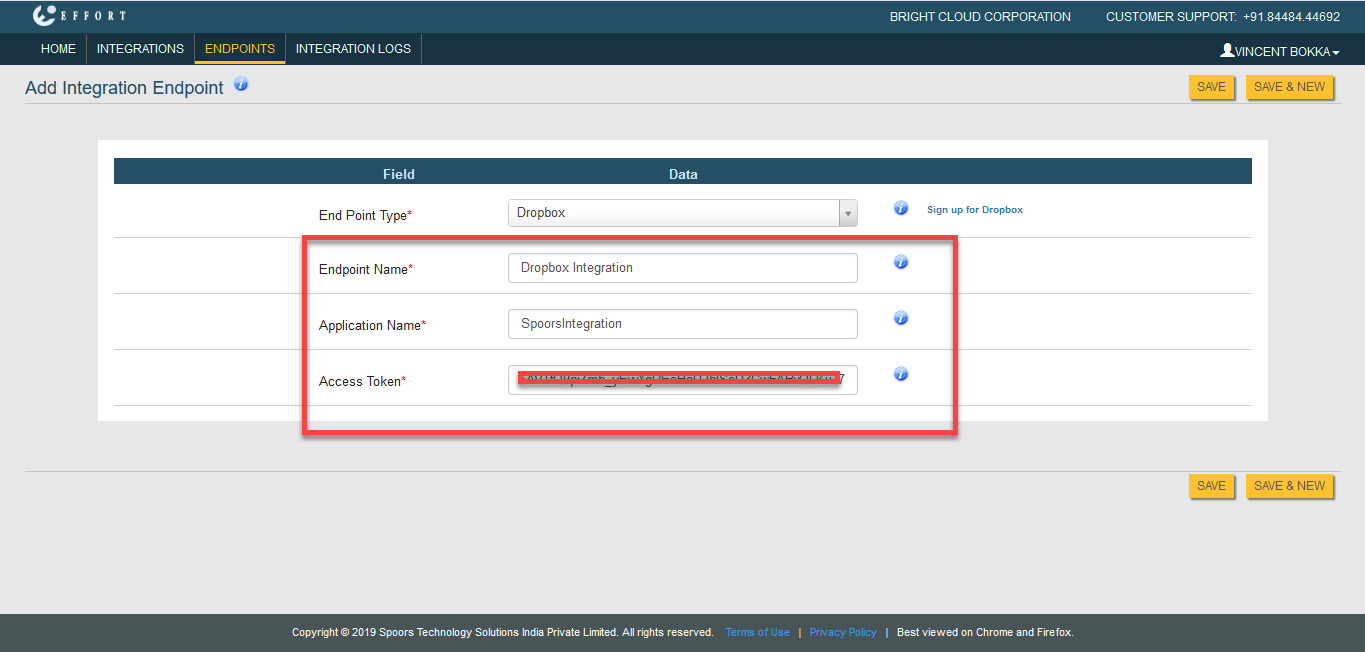
You will see the endpoint configuration page. Here, you must create an
endpoint to which you want to push the data. Select End Point Type as
Dropbox.
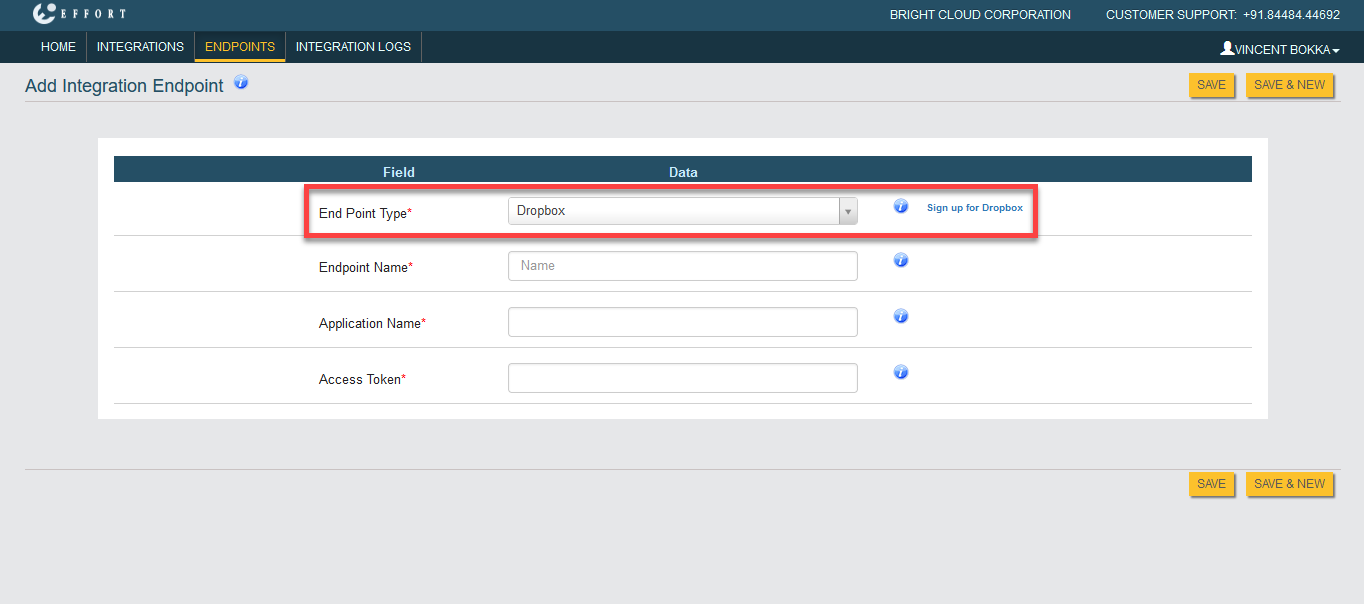
-
Enter a name in the Endpoint Name field. Enter the app name which we
created earlier in the Application Name field and the Access Token in
the Access Token field. Then Save the configuration.
In the above screenshot, we have created an endpoint named as Google Drive Integration. After saving it, you can view the endpoint on the List of Enpoints page.
Step 3. Create Integration Configuration
This section helps you to create an integration configuration. Here, we will configure the trigger source from which data need to be pushed.
-
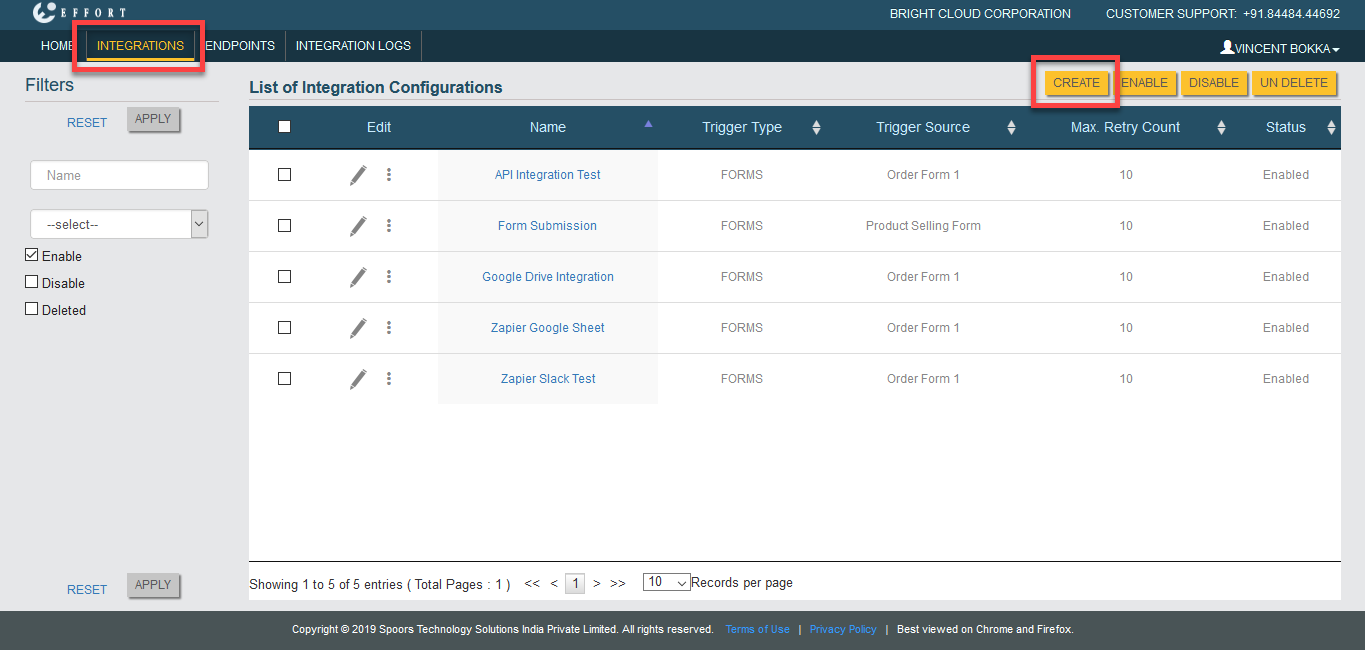
Now, click on the Integrations module. You will see the List of
Integration Configurations page. On this page, click Create
button.
-
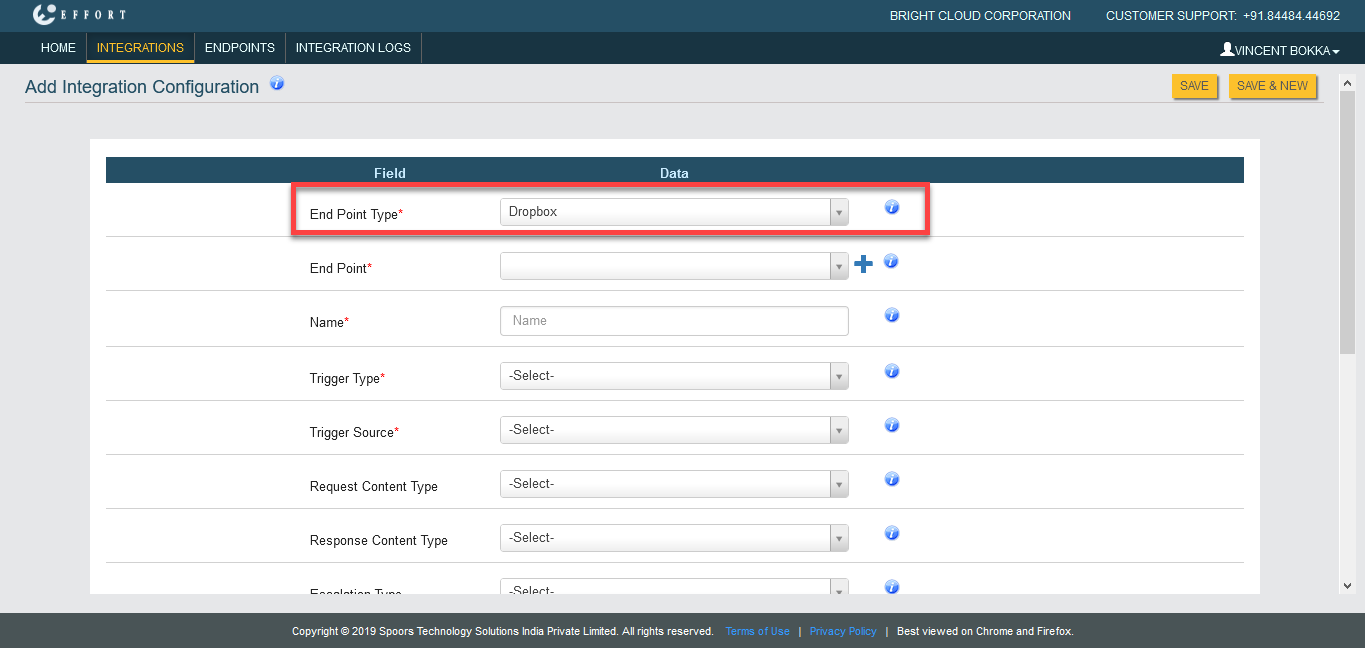
Select End Point Type as Dropbox.
-
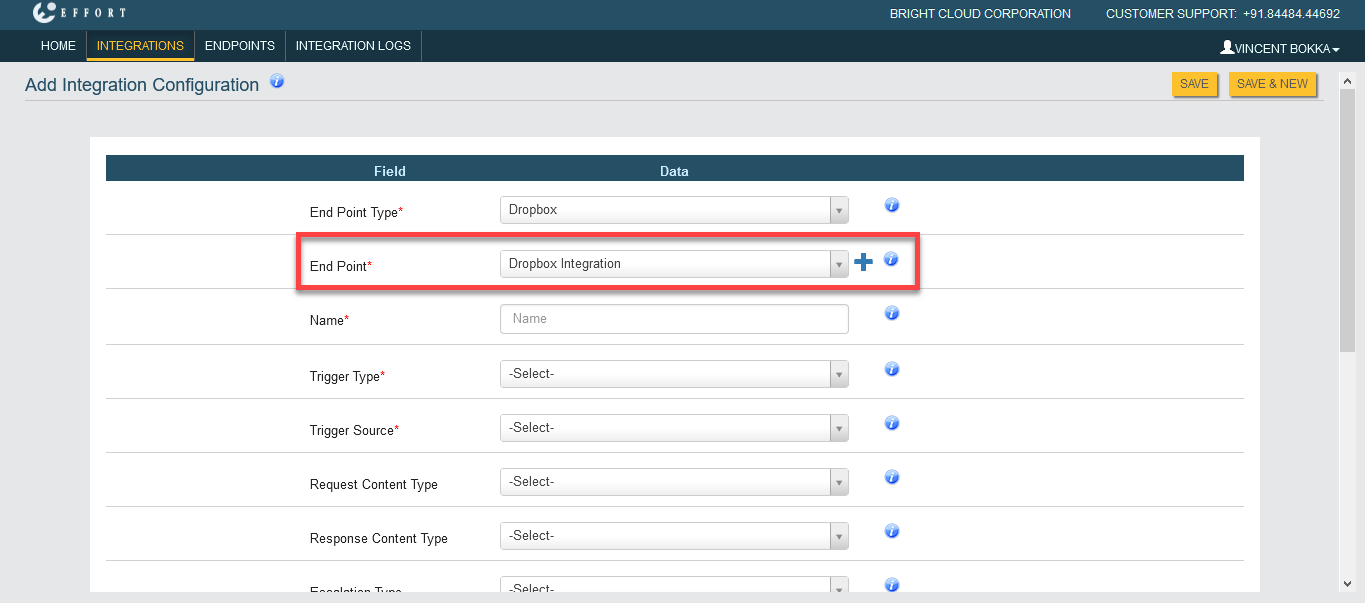
Select the endpoint which we created earlier from the End Point
dropdown.
- Enter a name to the configuration.
-
If you wish to push the forms data, select Trigger Type as
Forms or select Works to push the work data.
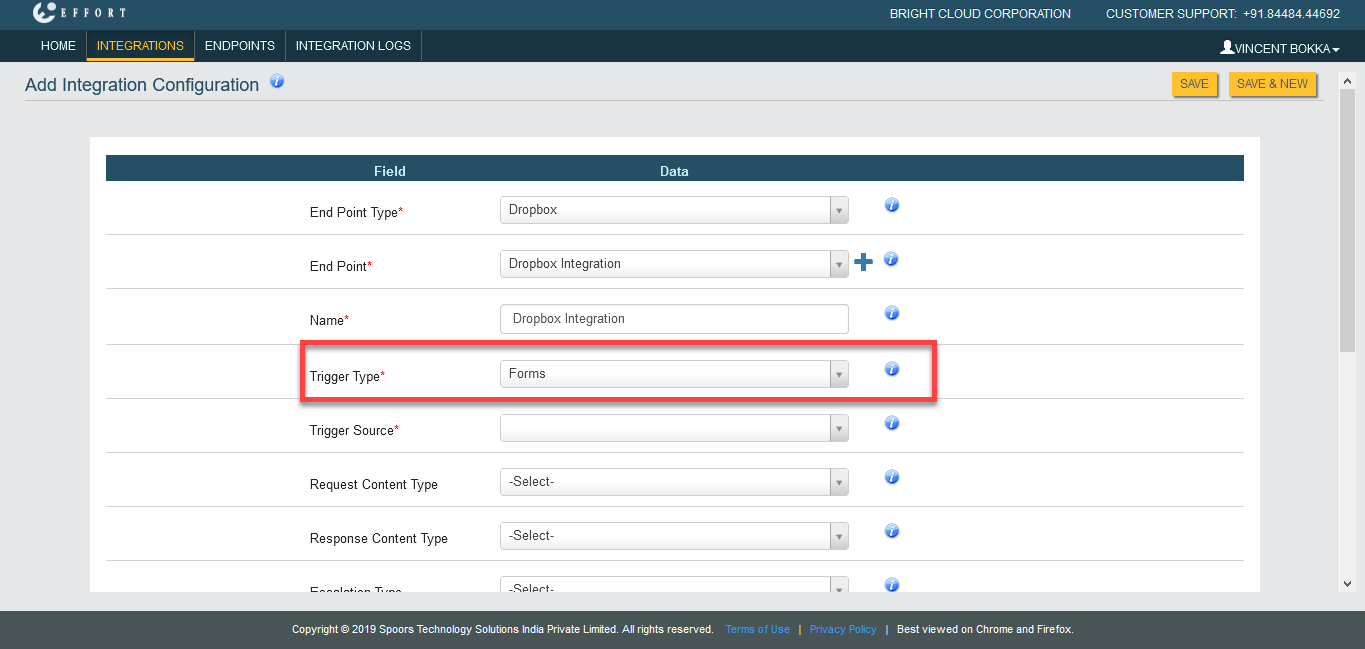
In the above screenshot, we selected Trigger Type as Forms. -
Based on the selection in the Trigger Type dropdown, you will see
either works or forms in the Trigger Source dropdown. Select a form
from which you want to push the data.
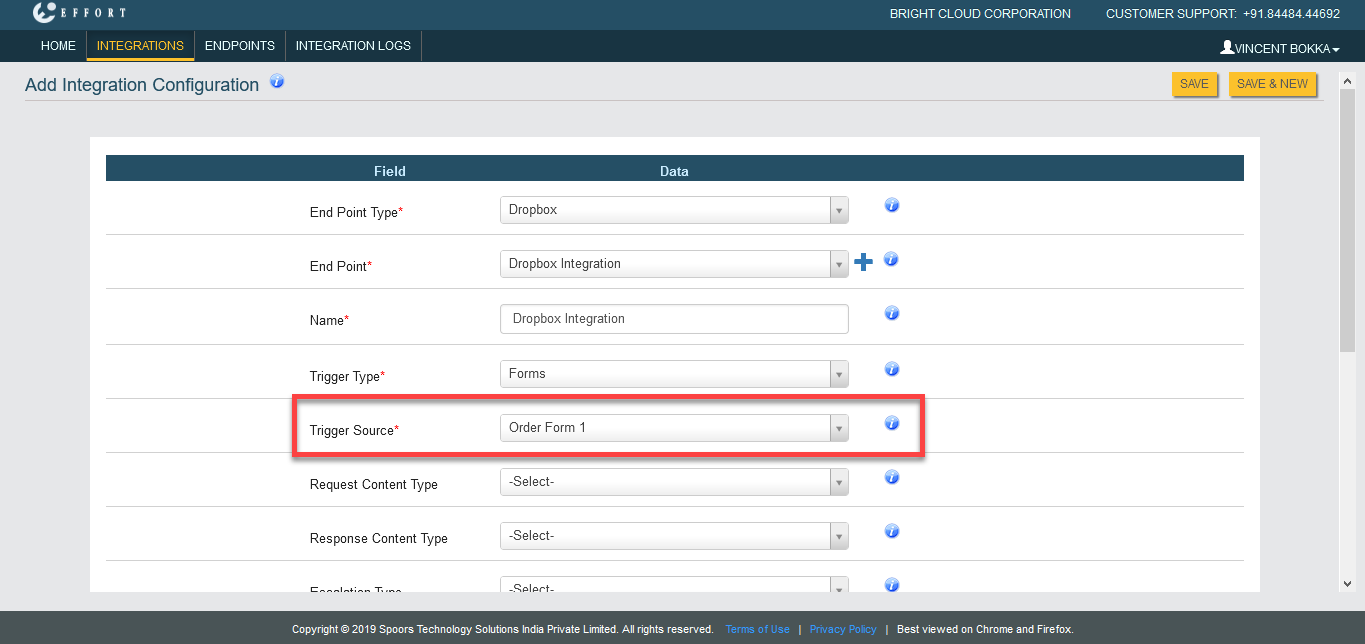
In the above screenshot, we selected Order Form from the Trigger Source dropdown. -
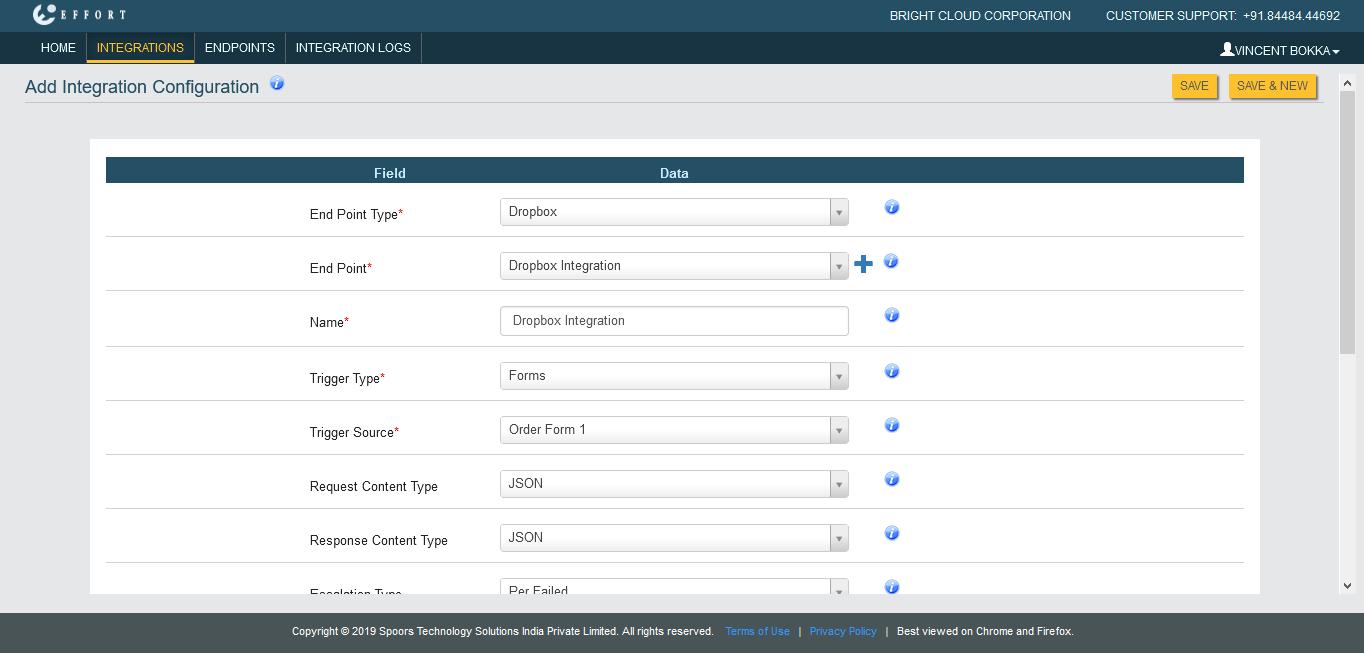
Set up the below fields as per your requirement and save the
configuration.
- Request Content Type
- Response Content Type
- Escalation Type
- Enable
- Retry Count
- Success Key
- Success Key Value
- Avoid Modification
-
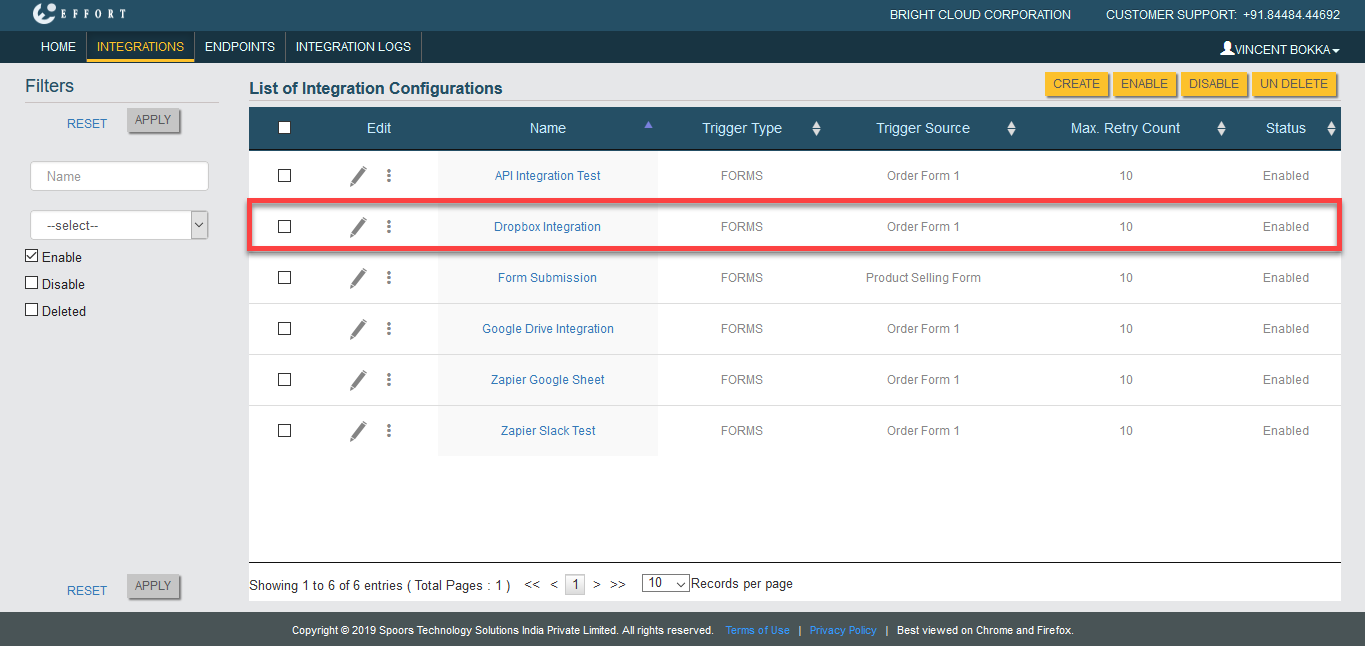
Now you can see the Dropbox Integration configuration on the
Integrations page.
Step 4. Configure Fields
This section helps you to configure required fields from which you want to push the data. You can add fields and customize the destination keys as per your requirements.
-
Click three dots
 icon
and select Request Mapper.
icon
and select Request Mapper.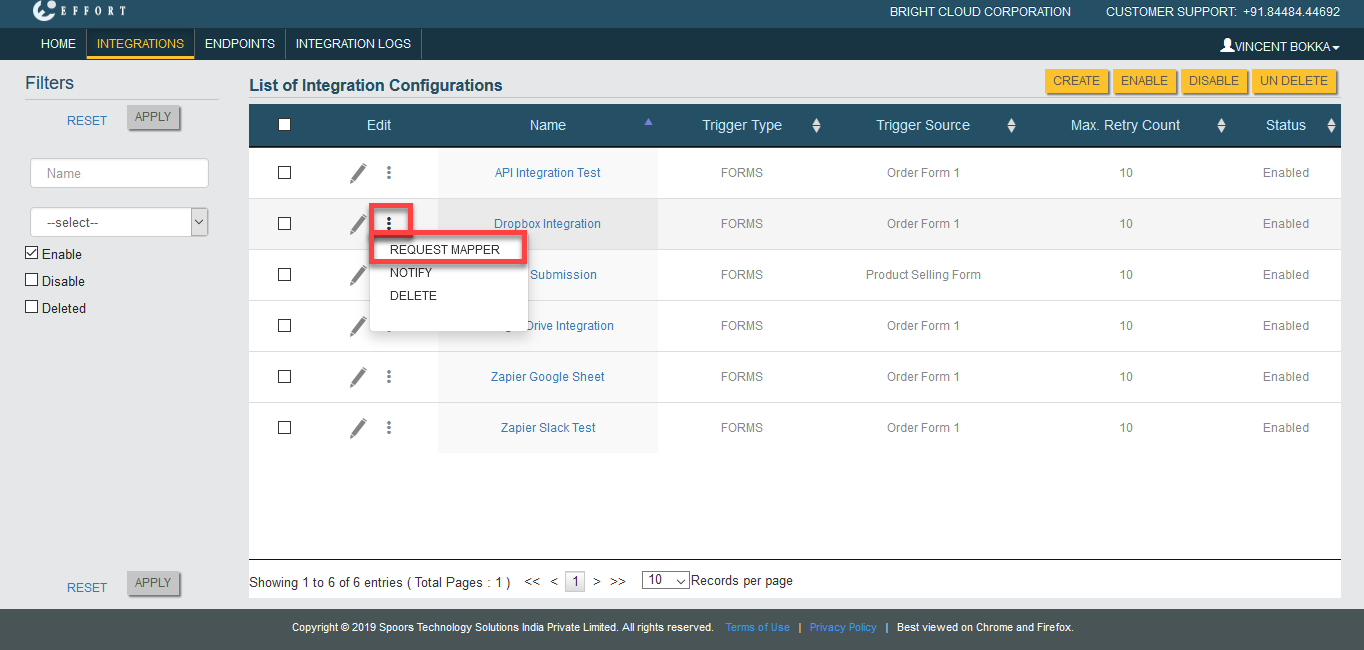
-
Click Add Fied button to configure the fields. Configure fields as
per your requirement and save the configuration.
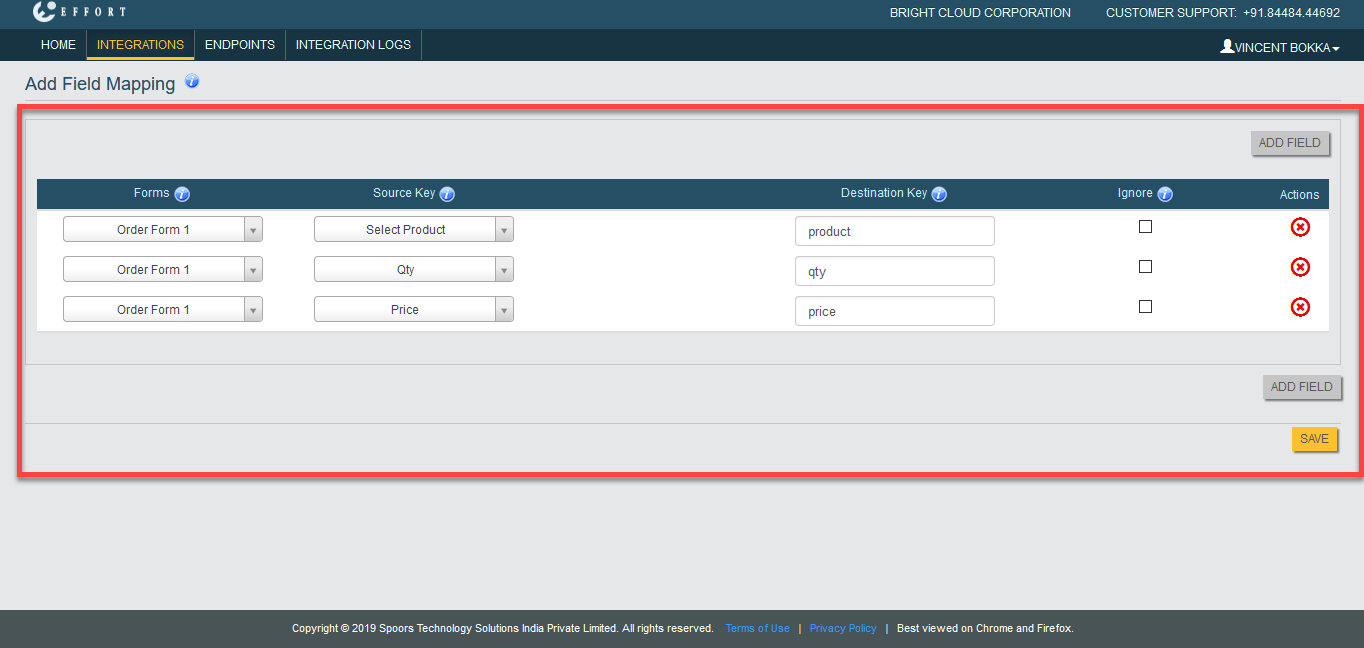
In the above screenshot, we have added only three fields such as Select Product, Qty, and Price from the Order Form 1 form spec. Whenever the user submits the Order Form 1, the data in these fields will be pushed to the endpoint which you configured.
Check out the Configure Fields for Integration page to know more about the Request Mapper configuration.
Check out the Create Notifications for Integrations page to configure notifications for the integrations based on the push status. The notifications will be triggered to the given email IDs when the status of the data push is changed.
The Dropbox Integration setup has been completed successfully.