
Perform Work Actions Without Logging into Effort
The users just need to open the link and complete the work action. This is best used for managing workflows like new client onboarding, expense and claim management, etc. In this tutorial, we will create a sample workflow that is configured with External Action to collect additional details from the customers.
Getting Started With Forms
In this section, we will create a sample form to collect additional details from the customer.
- As a first step, we need to create a sample form. Check out the Create a Form page to know how to create a form.
-
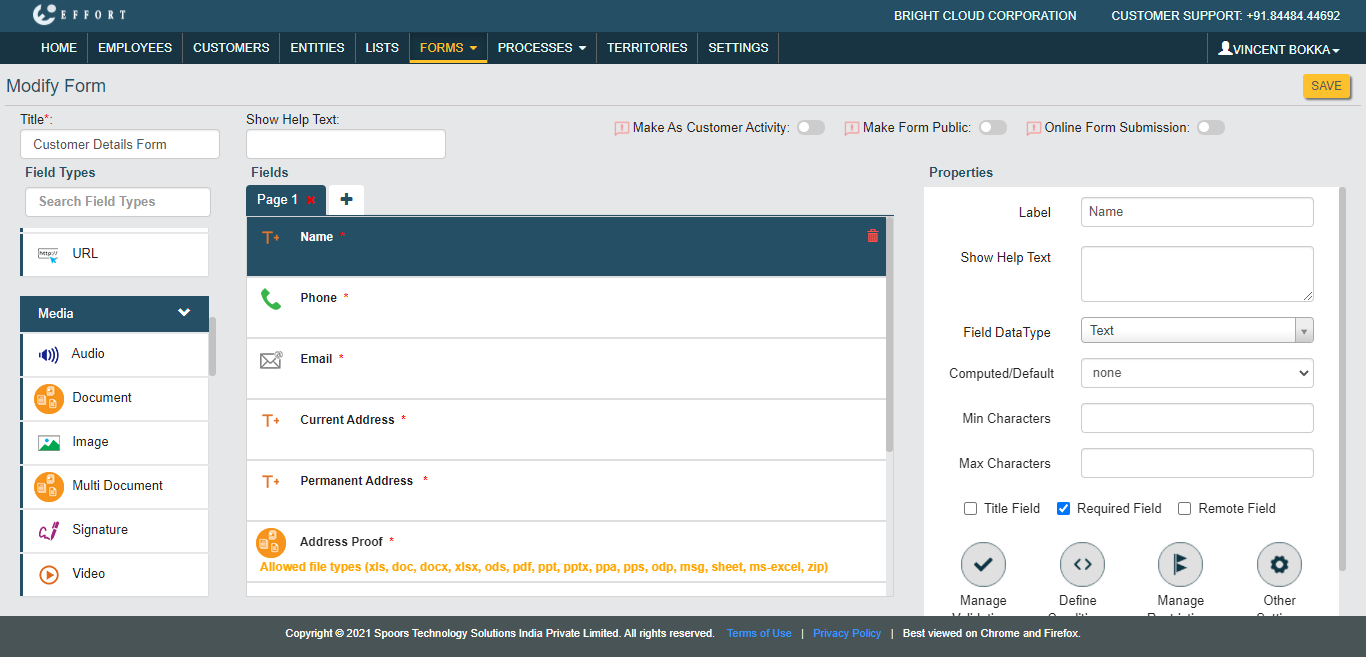
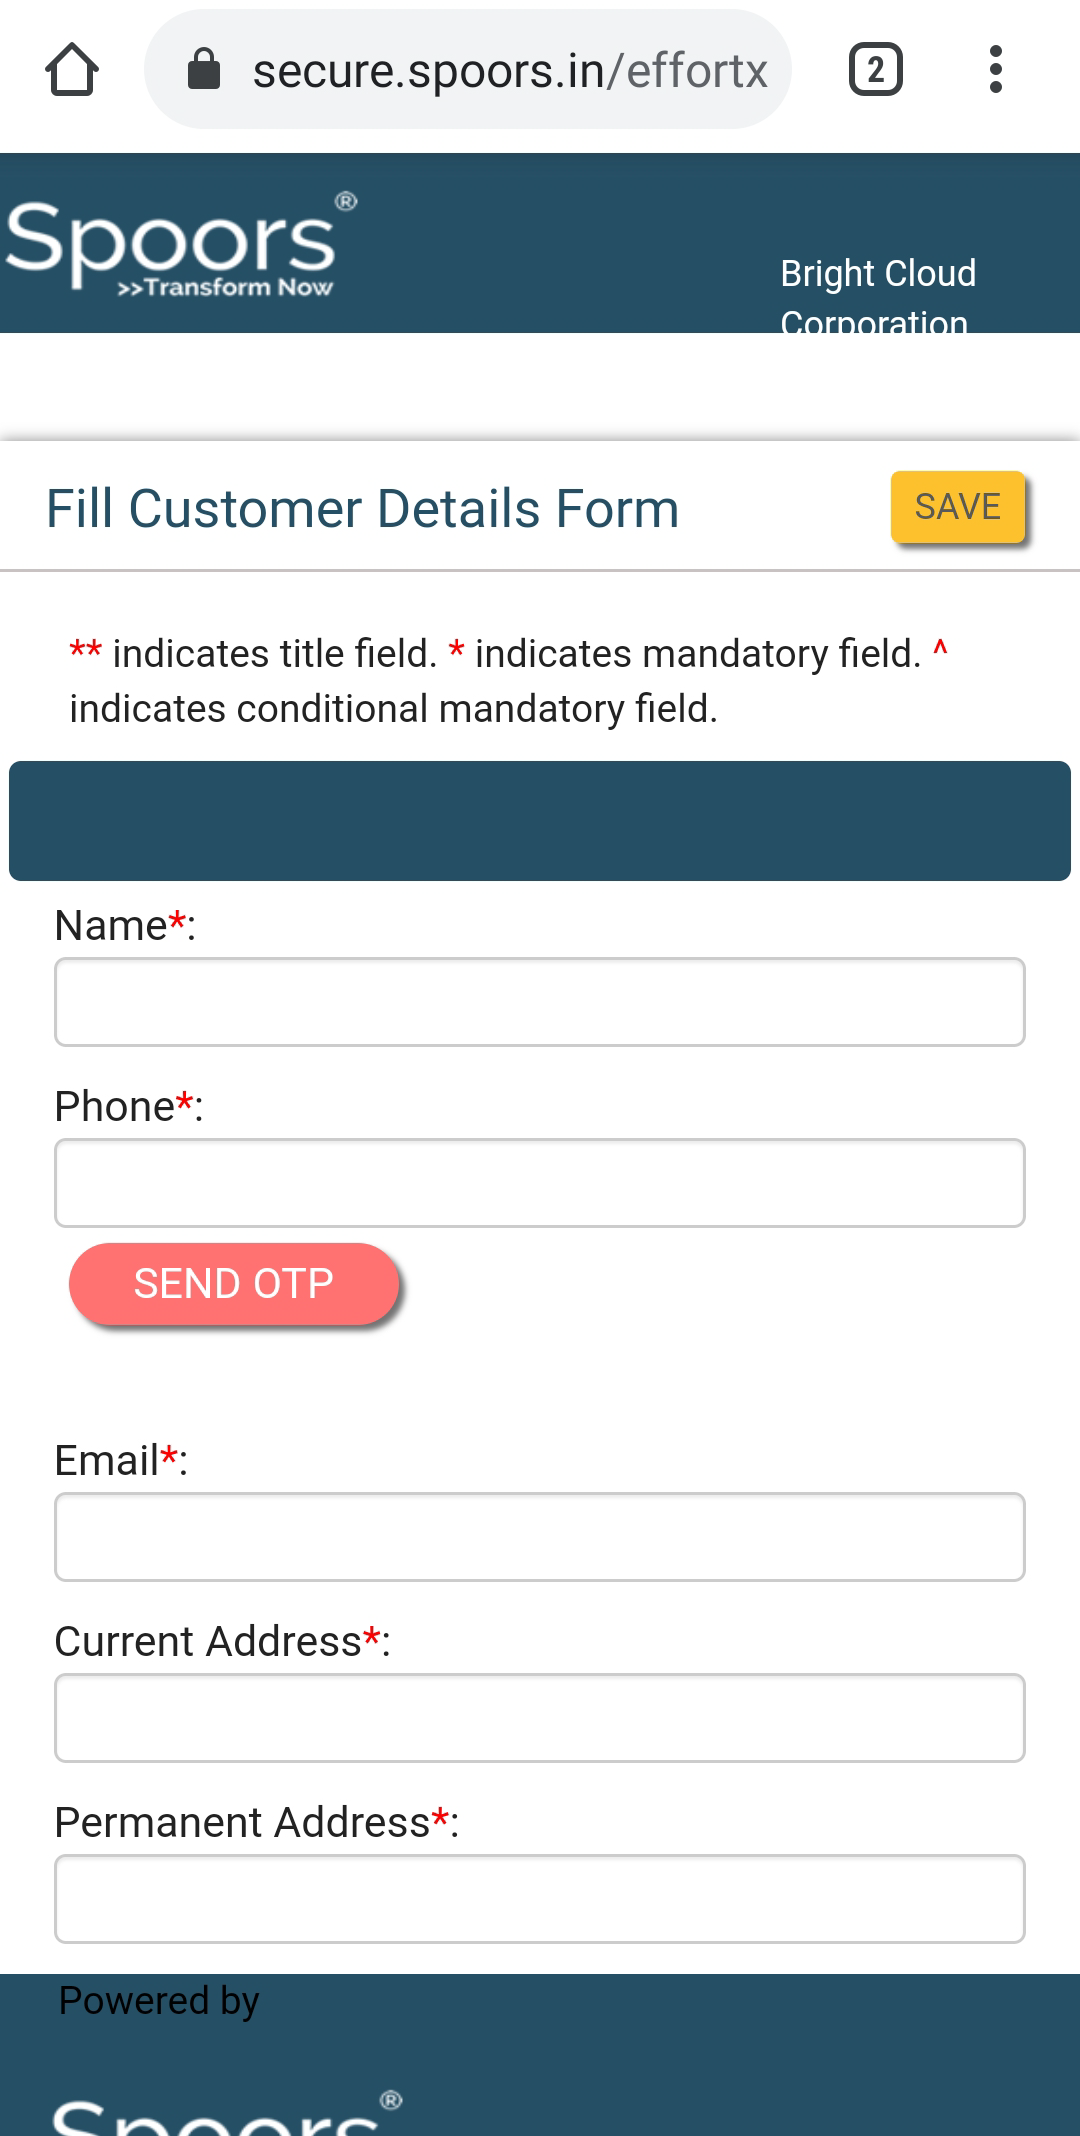
Create a form to capture the details you need. Look at the below image for
the sample form.
-
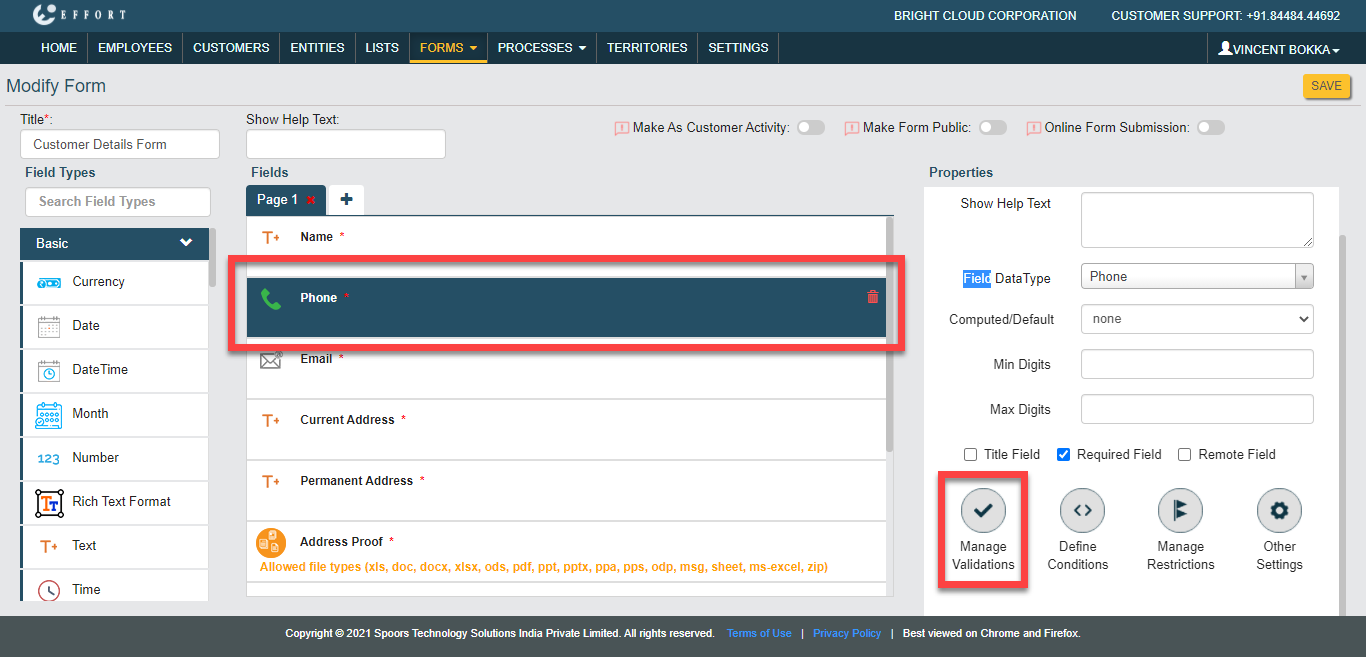
If you would like to verify the customer's mobile number using OTP, click
on the Phone data type and click on the Manage Validations
button.
-
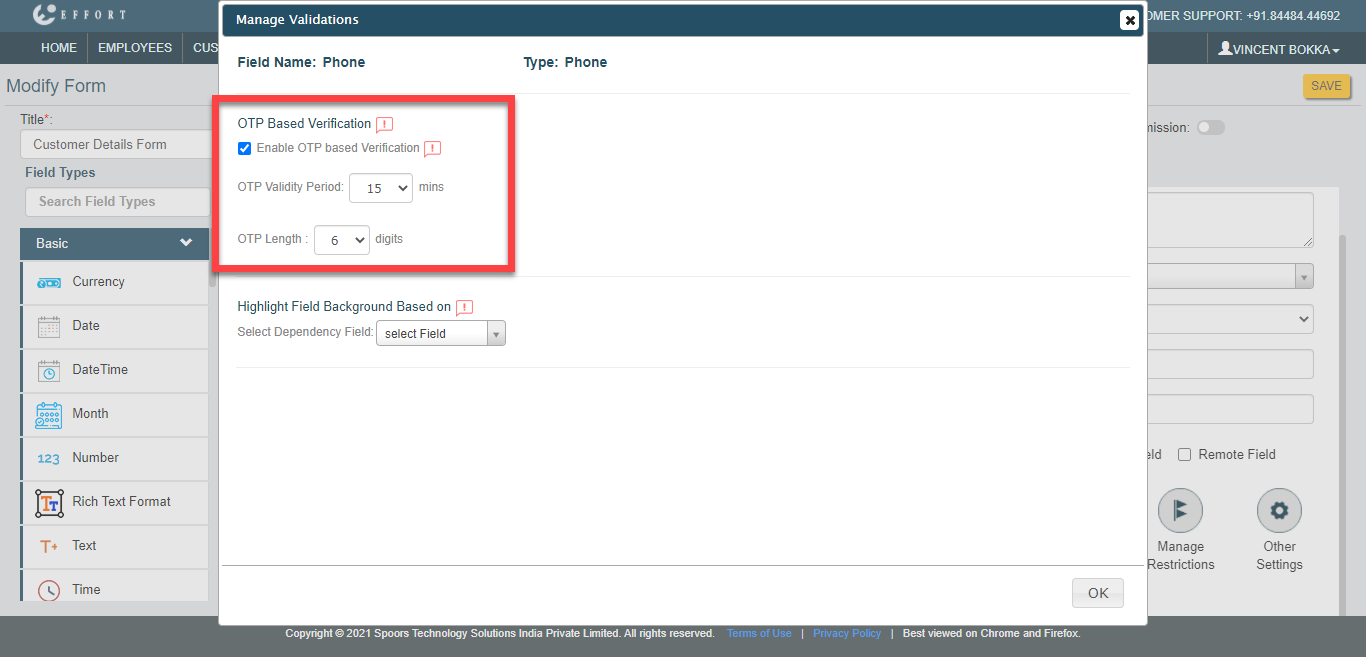
Configure as shown below and click OK.
- Enable publishing and Save the form.
Create a Sample Workflow
This section helps you to create a sample finance workflow that is configured with the external action.
- Now we need to create a work process. Check out the Create an Action Process page to know how to create a work process.
-
Create the work process as shown below. Create the first action with the
title as Collect Customer Details and configure the Customer
Details Form to the first action. Under the Action Type
dropdown, select External Action as shown below.
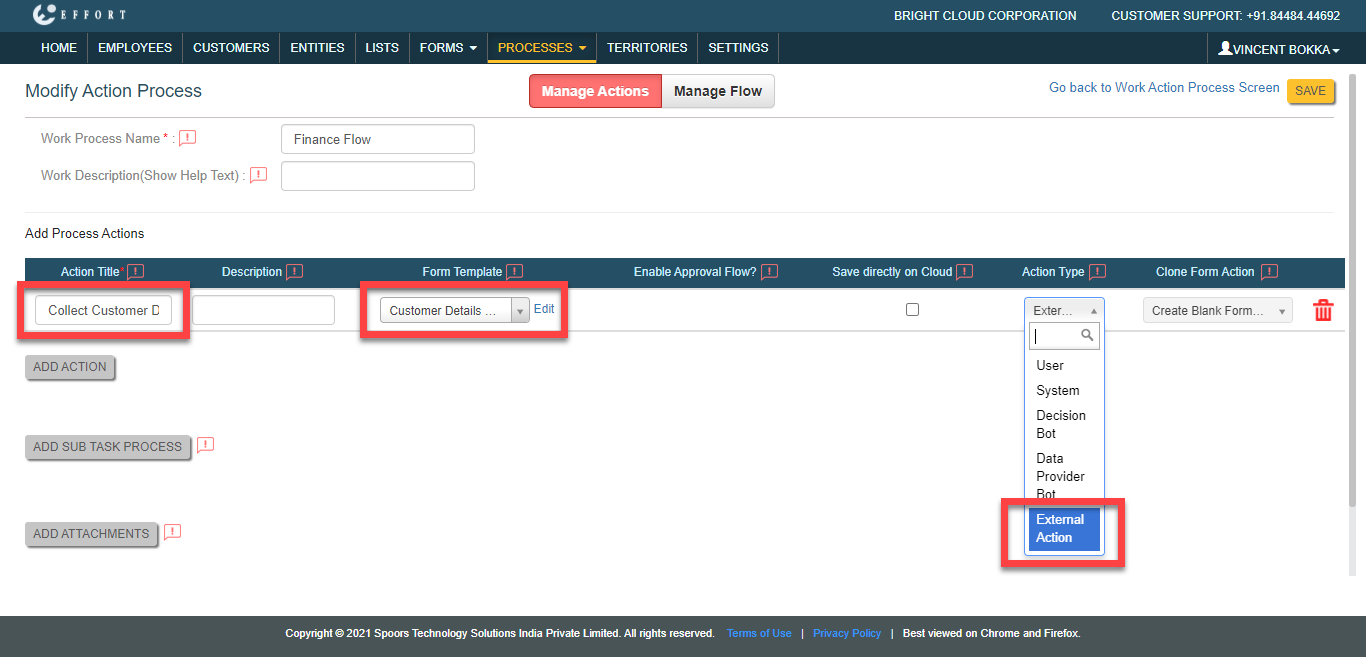
If you set the Action Type to External Action, it indicates that the action will be performed by the external users. -
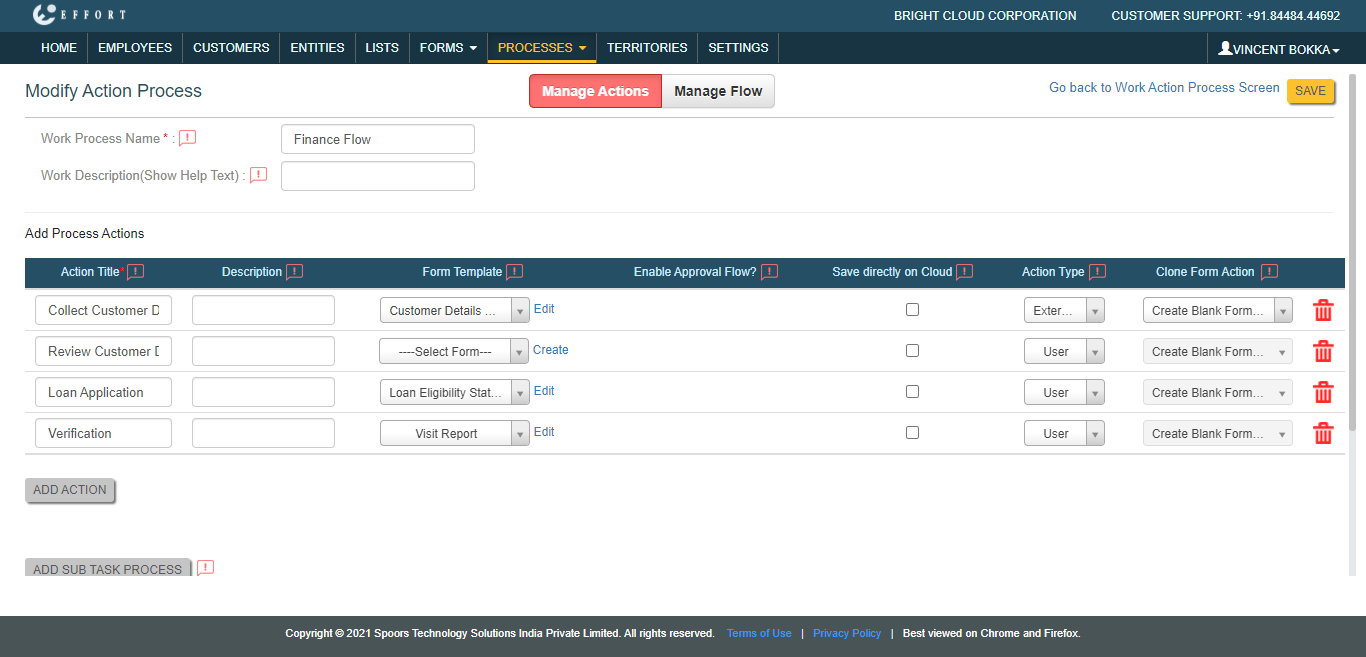
Create the remaining actions as shown below and save the process.
-
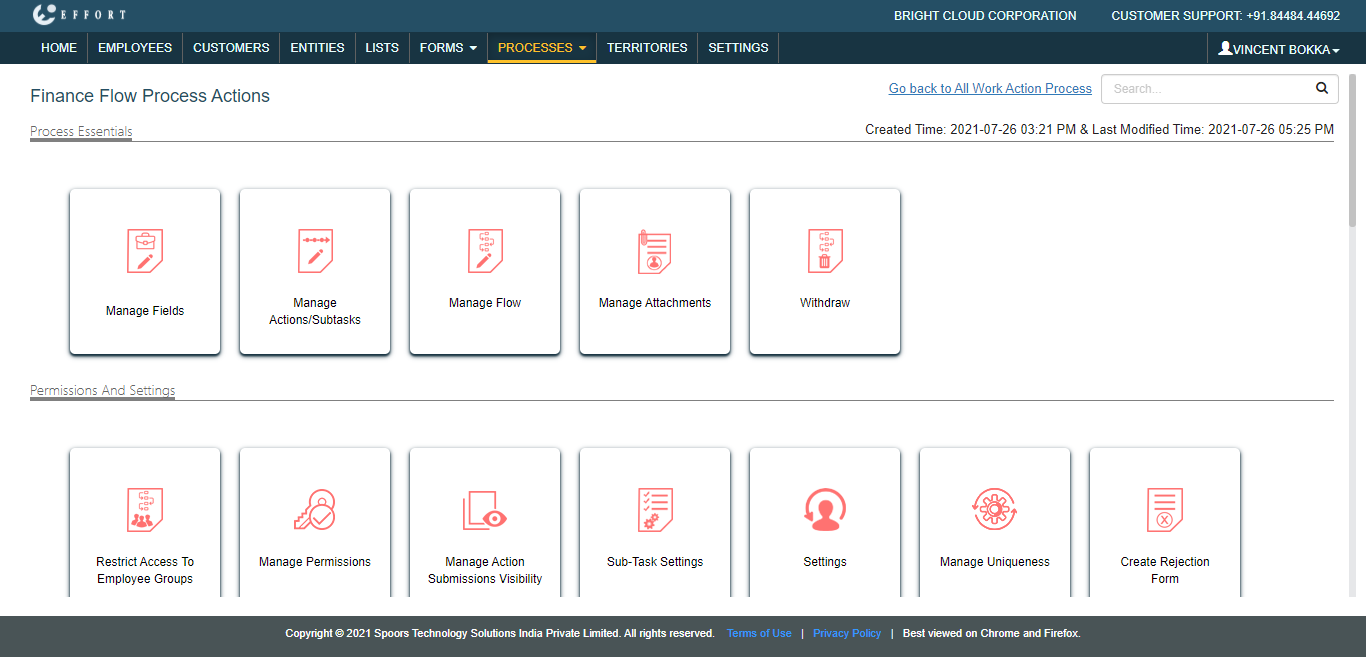
You will see the work process actions page. Click on the Manage
Fields card.
-
Set the visibility of the fields as shown below and Save.
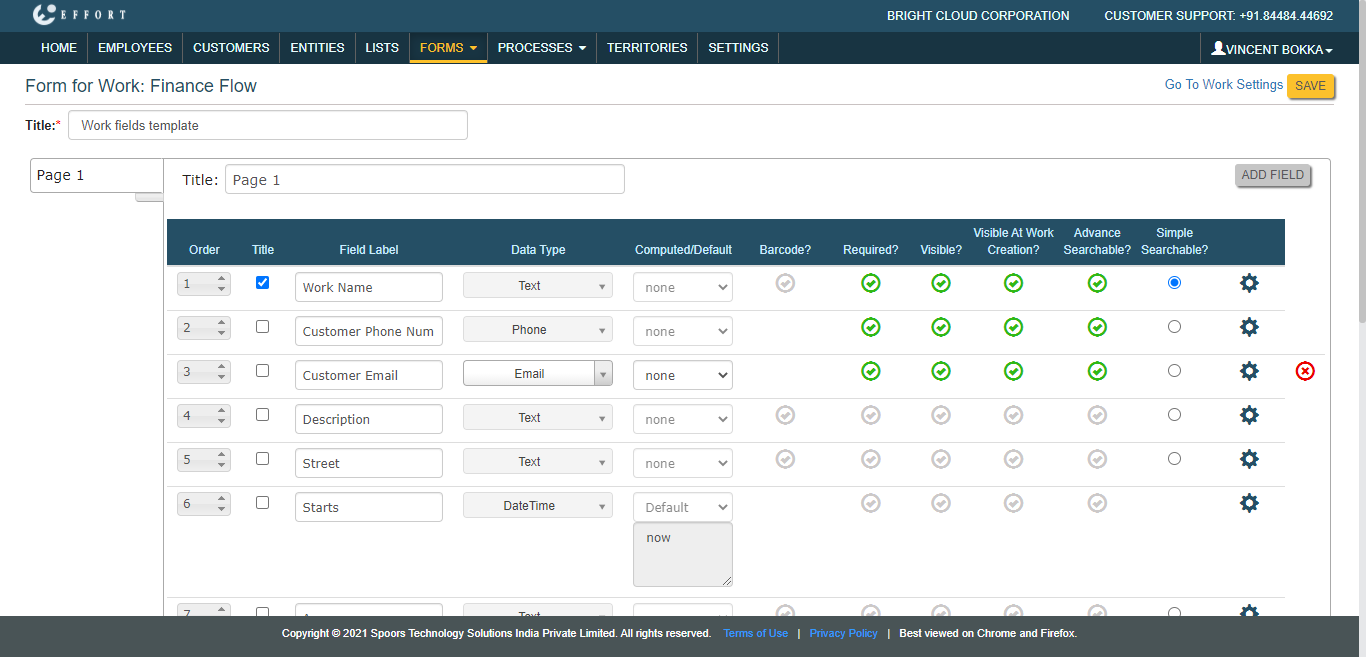
You can include fields as per your requirement. Here, I have given only three fields for testing. The Phone and Email fields are mandatory to configure external action. -
You will see the work process actions page. Click on the Manage Flow
card.
-
Define the workflow such as Start Action, End Action, and Next Actions as
shown below. Click the gear icon under the Configure Bot / External
Action column.
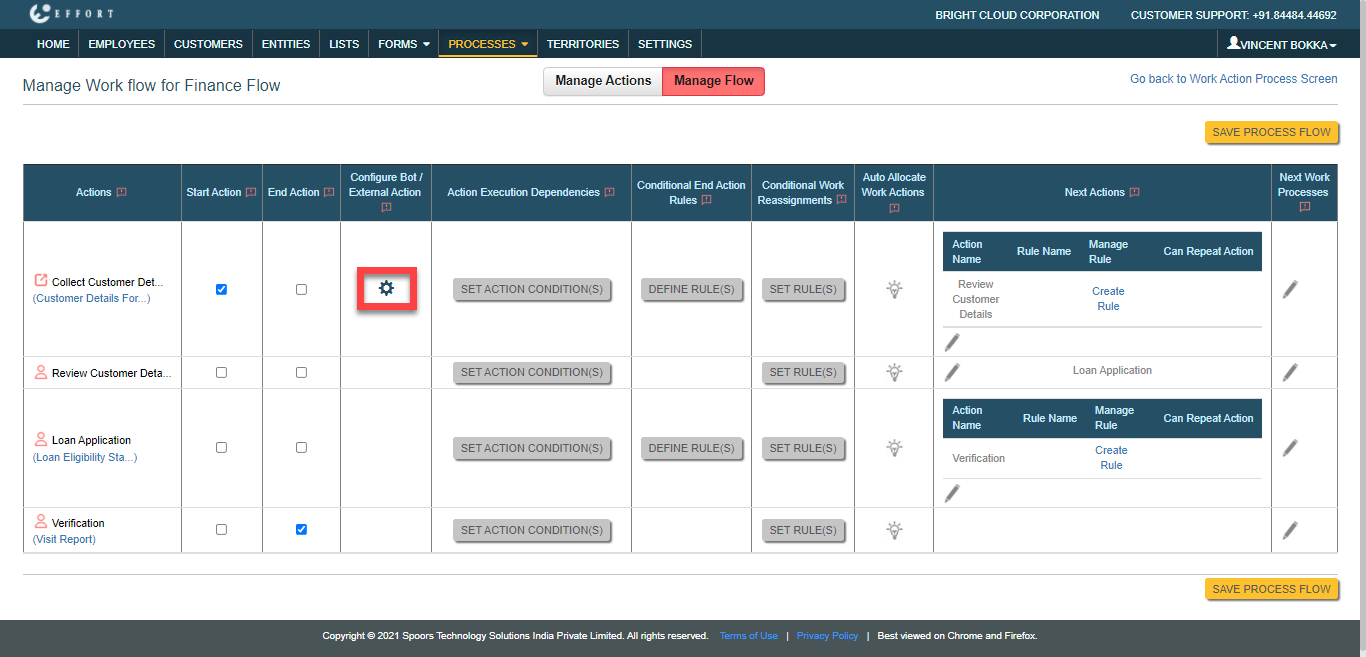
The External Action Configuration page appears. -
Click on the Add Input button.

-
Configure the fields as shown below.
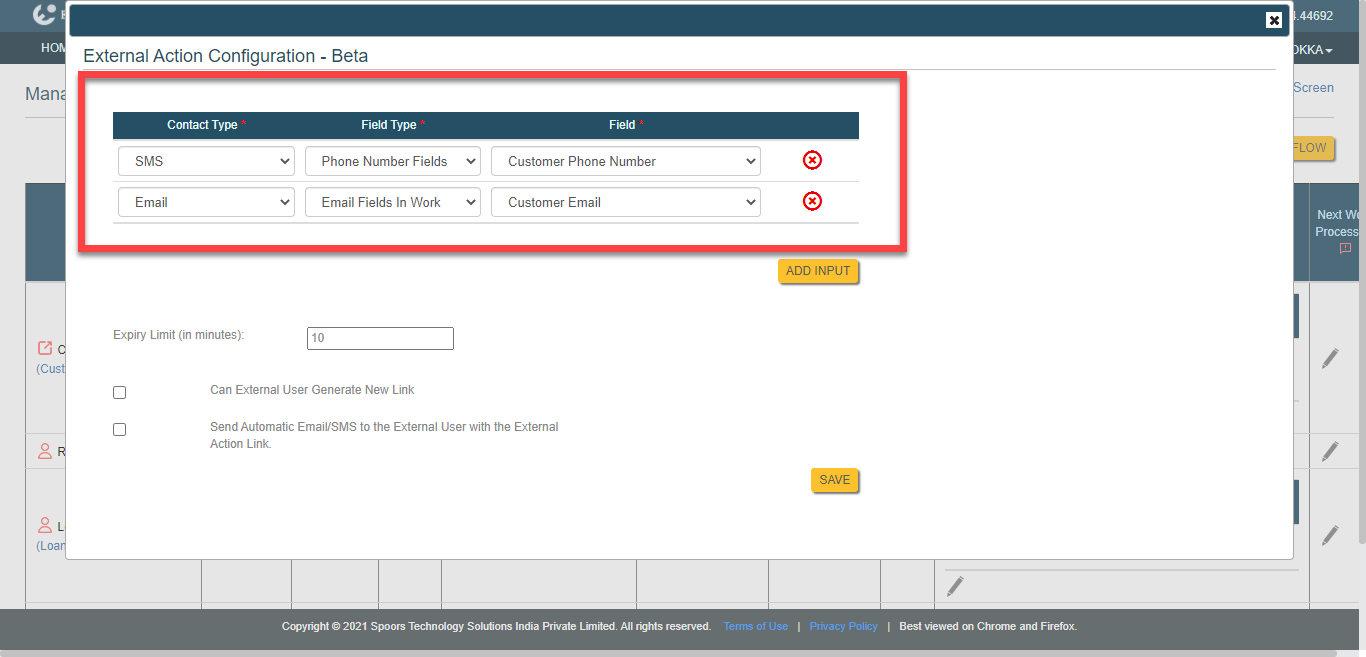
The work action link will be sent to the email and phone numbers that you enter in these work fields. -
Set the link expiry limit and Save the configuration. The link is valid for
the configured period, and the user needs to complete the work action within
that period.
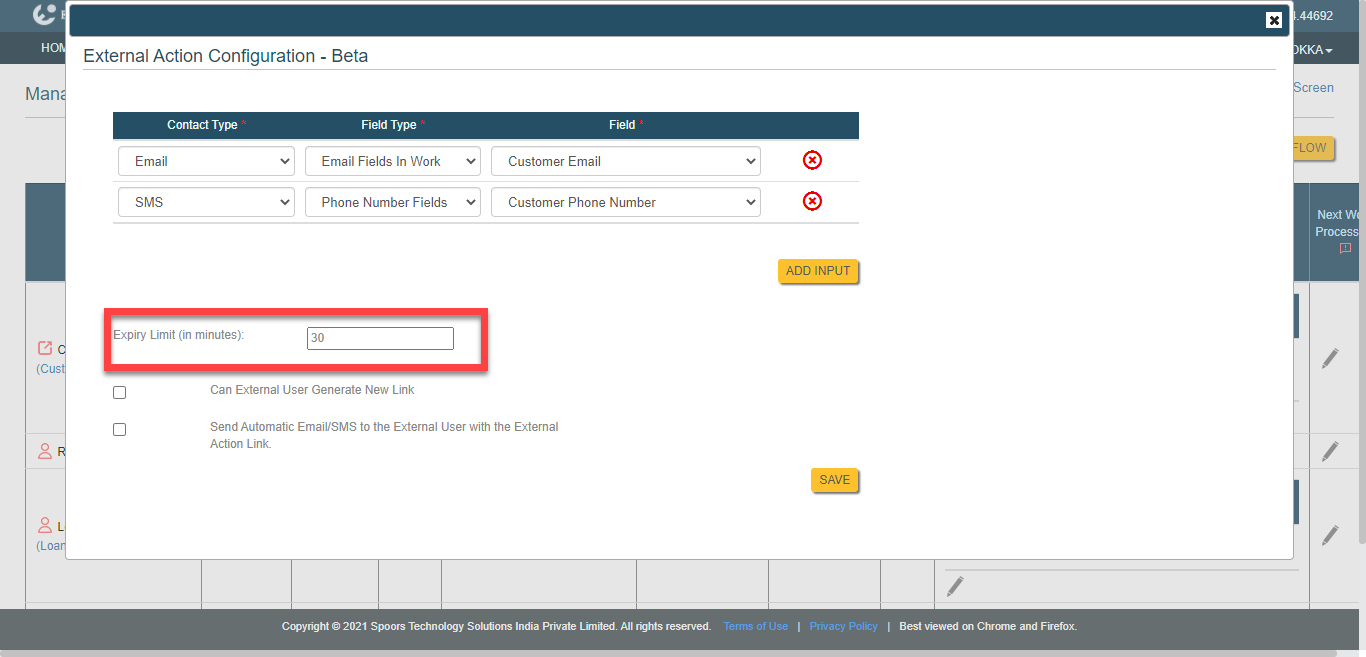
- Now click the Save Process Flow button to save the workflow.
Check How The External Action Works
Here, we will create and perform the work that we created now and check how the external action works.
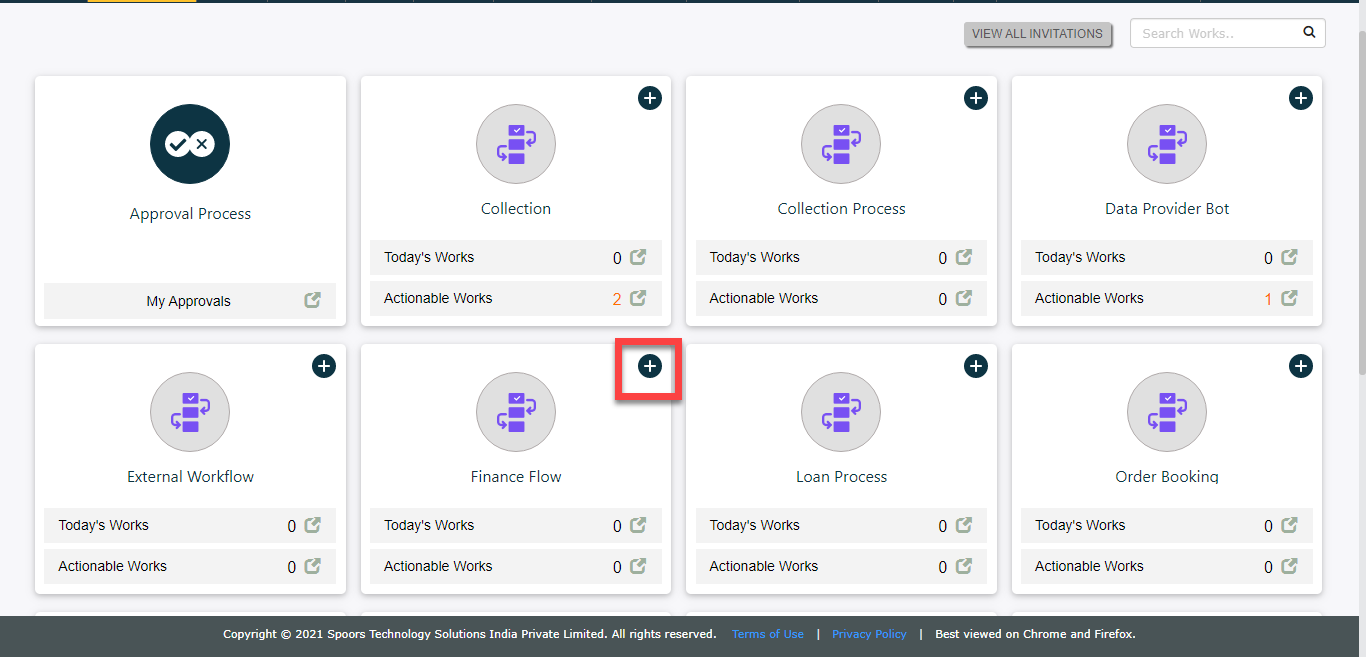
- Navigate to .
-
Click the plus icon located on the work process card.
-
Enter work details in the work fields and click Save.
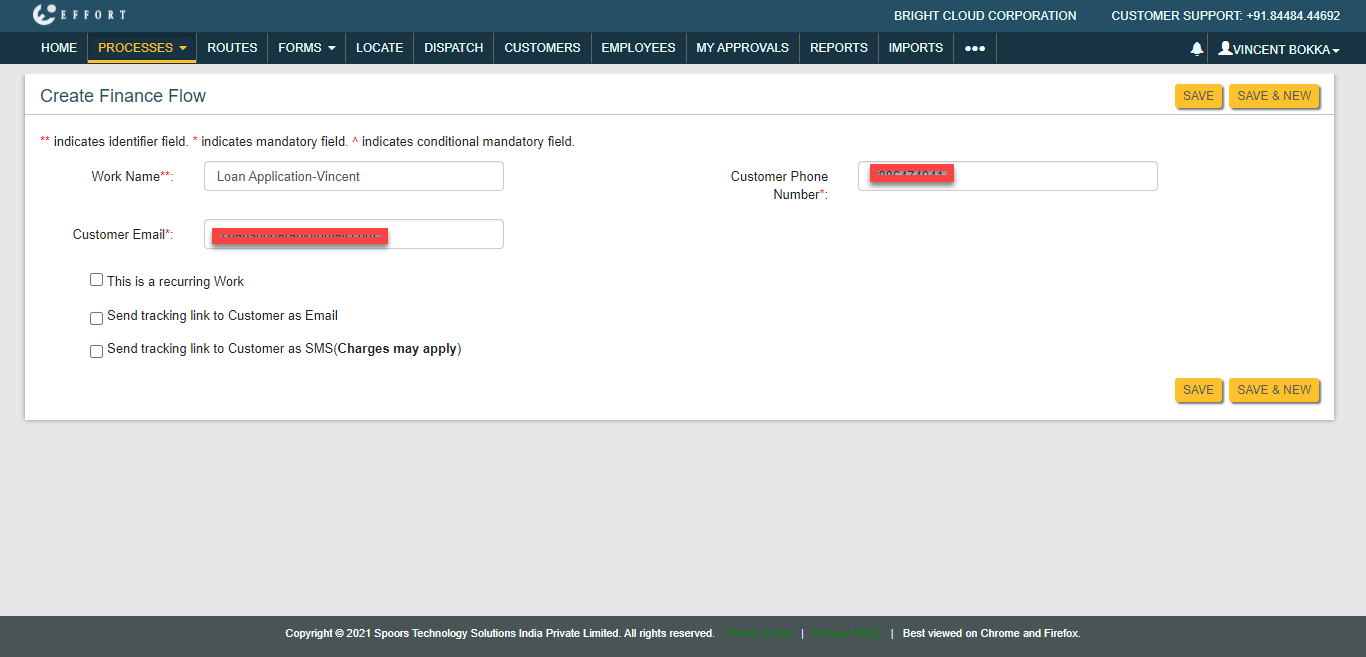
The customer's email and mobile number are mandatory. As per the configuration we defined in the External Action Configuration page, the work action link will be sent to these email Id and mobile numbers. -
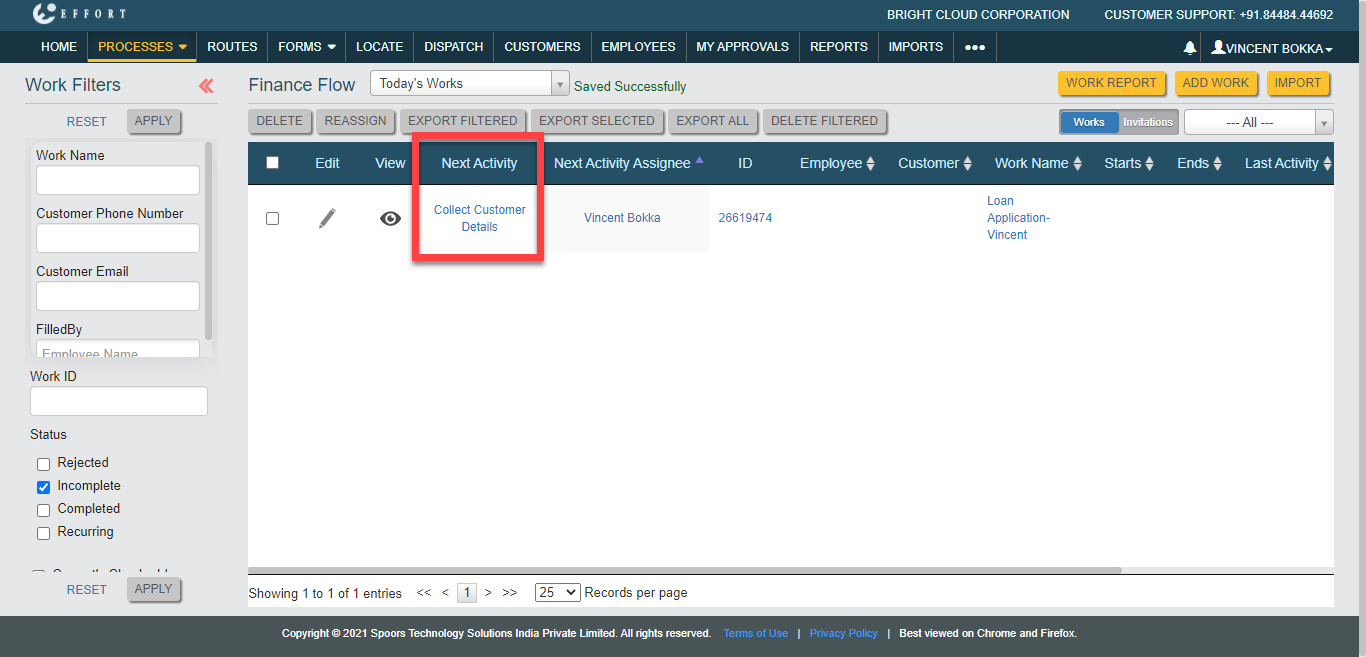
Now you will be redirected to the work process page. Click on the action
name link given under the Next Activity column.
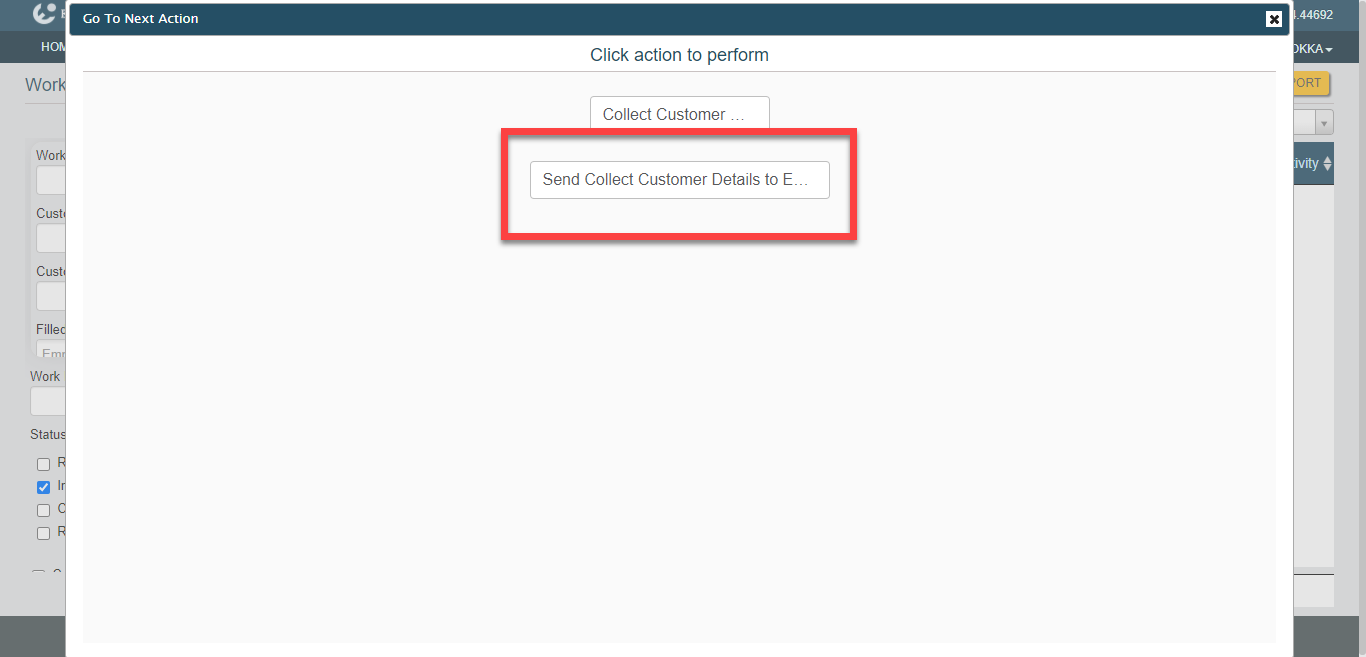
-
You will see a pop-up with two options as shown below. Click on the second
option to send the work action link to the customer's email and mobile
number.
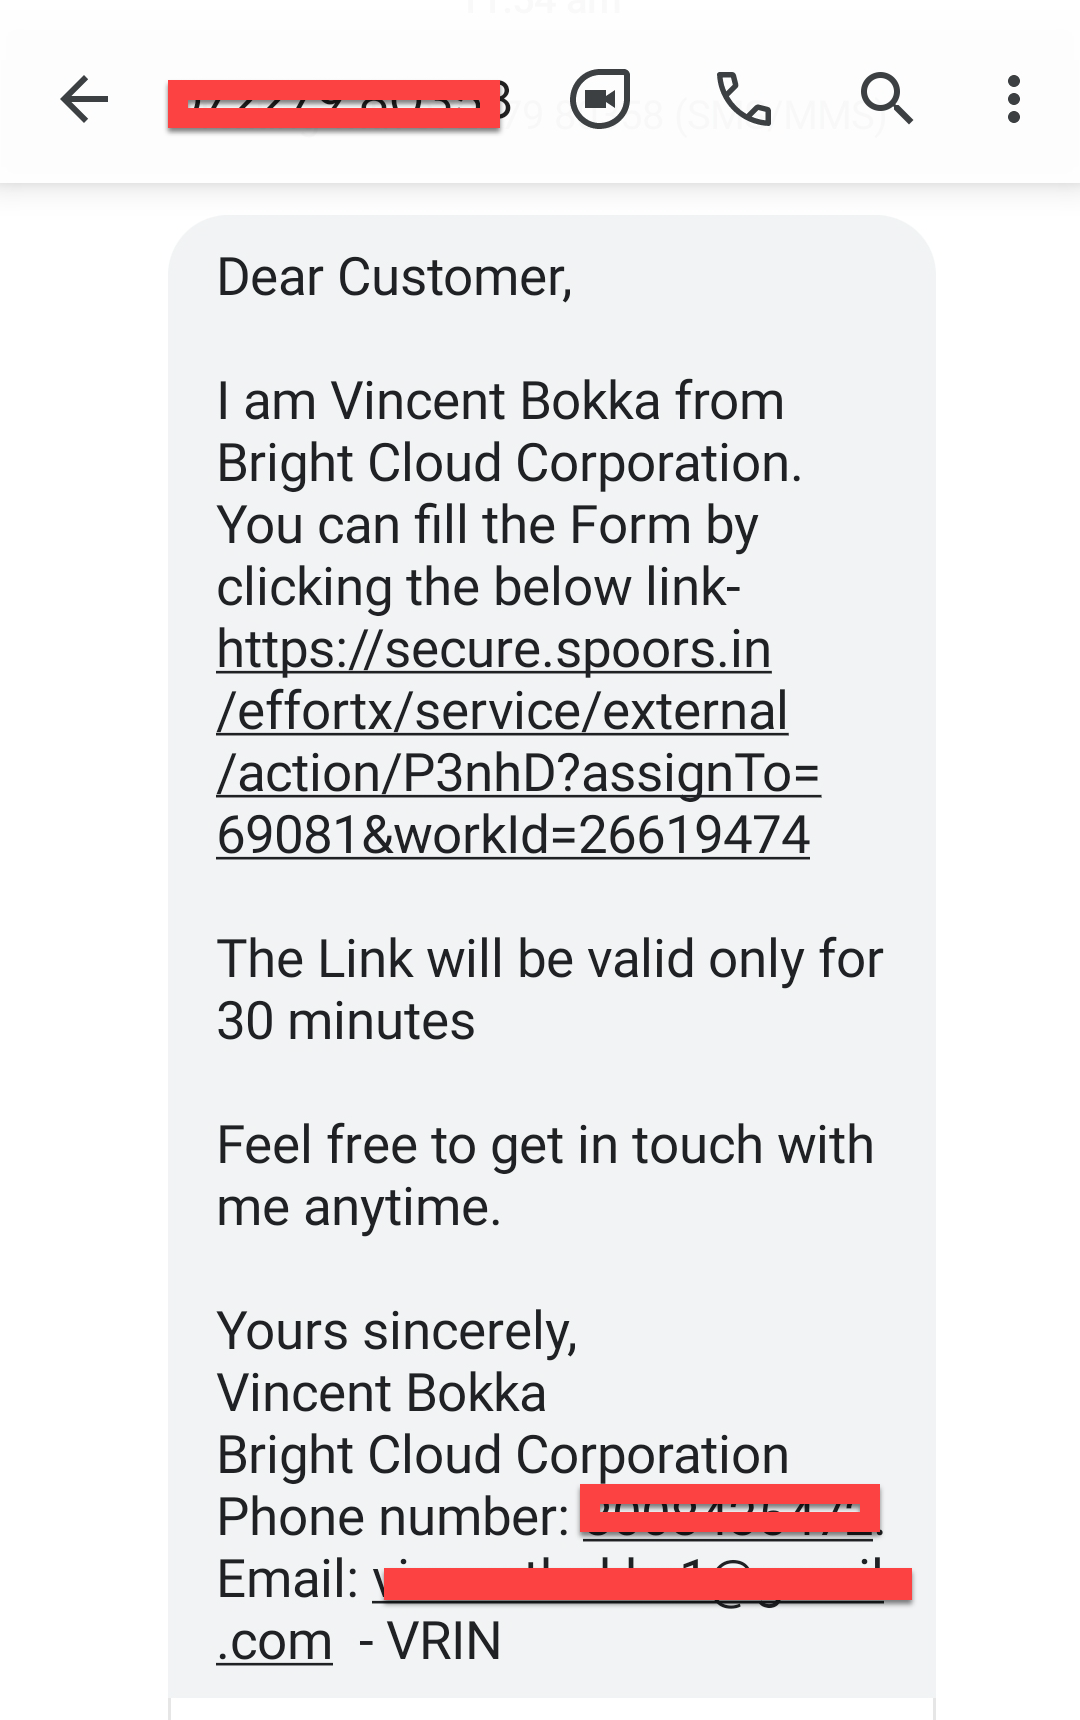
-
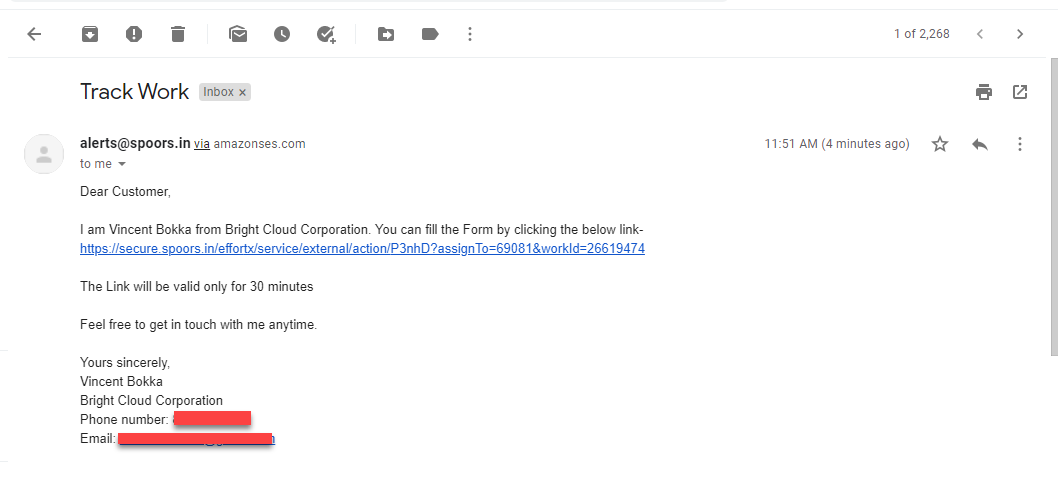
Now the work action link will be sent to the customer's mobile number and
email. Look at the below images for your reference.
-
The users need to click on the link and fill the form.
-
The first action gets completed once the user submits the form. You can see
the form submission details on the work view screen.
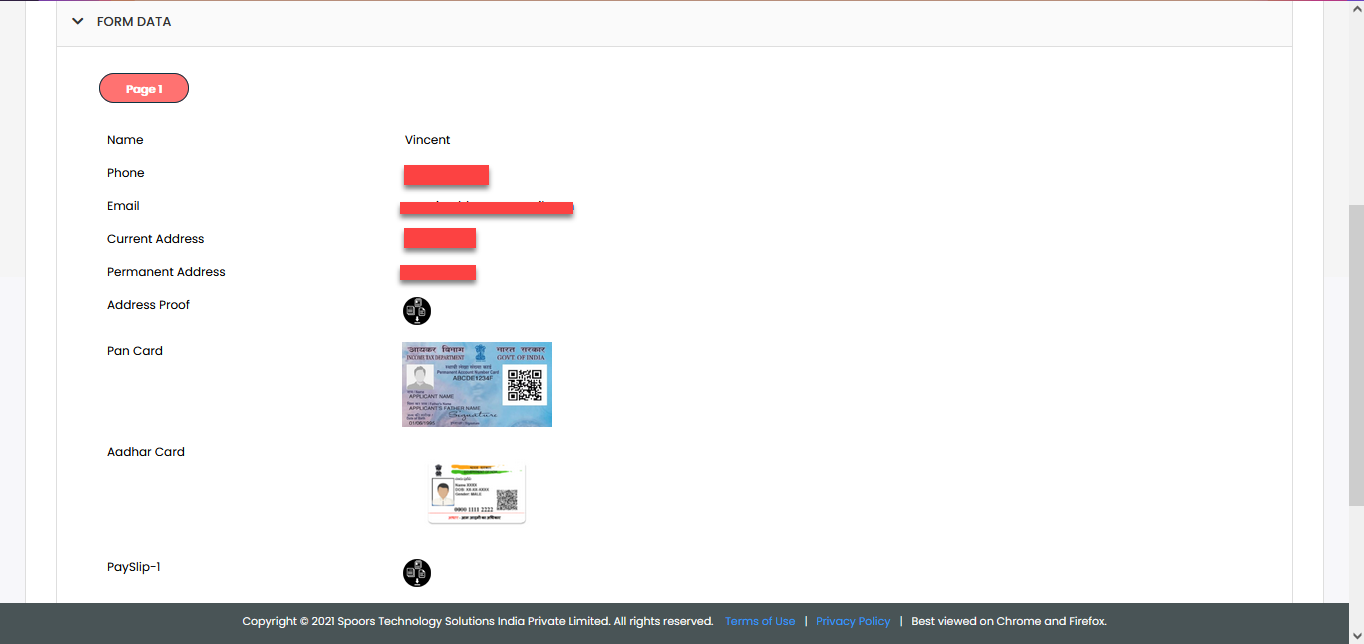
You can review these details and perform the remaining actions.
This is the functionality of the external action. It allows you to perform the work actions without logging into the Effort platform.